fbpx

Category: knot theories

This work was on display during March, 2021 at The Emporium Gallery in downtown Knoxville.

Knots are continuous lines twisted in such a way to give the illusion of lines overlapping in the same plane. Using a formalized system of knot creation, the artwork here represents knots in multiple “in-between” dimensions in three categories, each based on a partial dimension:

– unicursal, self-contained lines which appear to overlap on two-dimensional surfaces (unicursal knots)
– knots on tiled surface planes of regular polyhedra (metatronic solids)
– elements of non-orientable surface segments (listing bands)

Each piece is based around a simple line or shape translated or rotated to create more complexity. Light and shadow are an important element, so artworks appear different in their environment depending on the time of day. The shapes and symbols they create are purely geometry, with no hidden meaning beyond the beauty of intricacy.
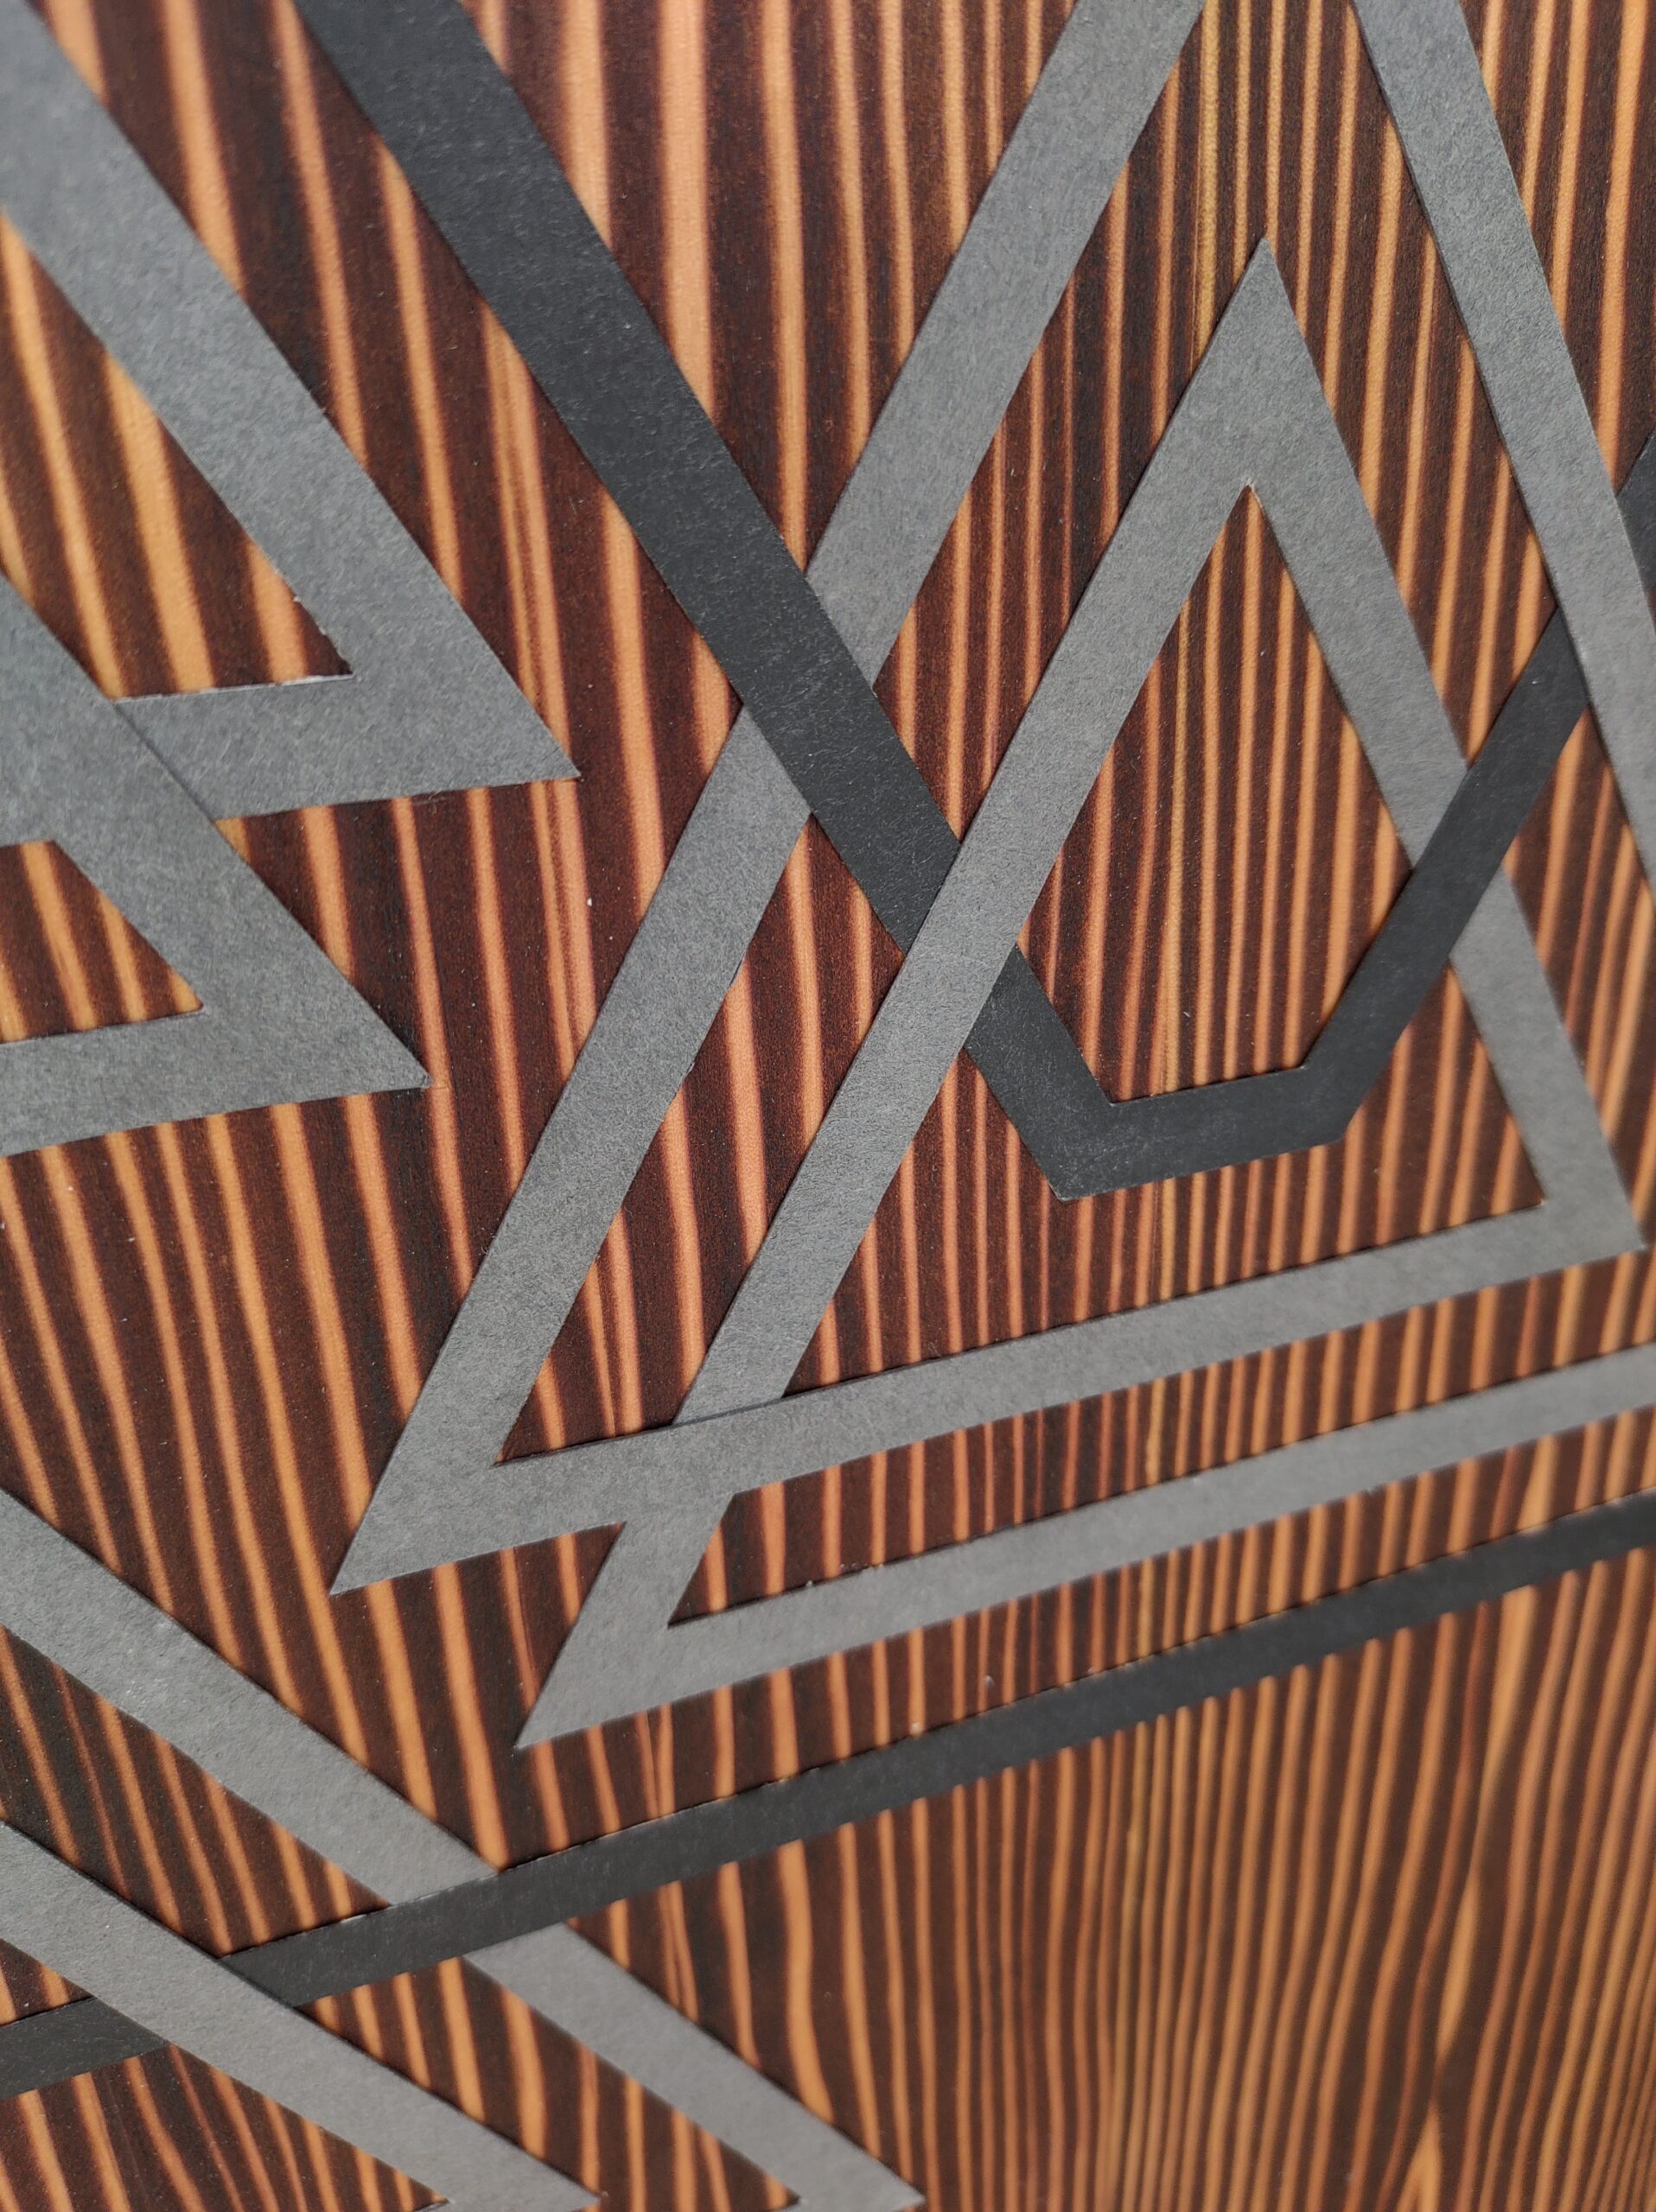
  • chatoyant tercet knot

    chatoyant tercet knot

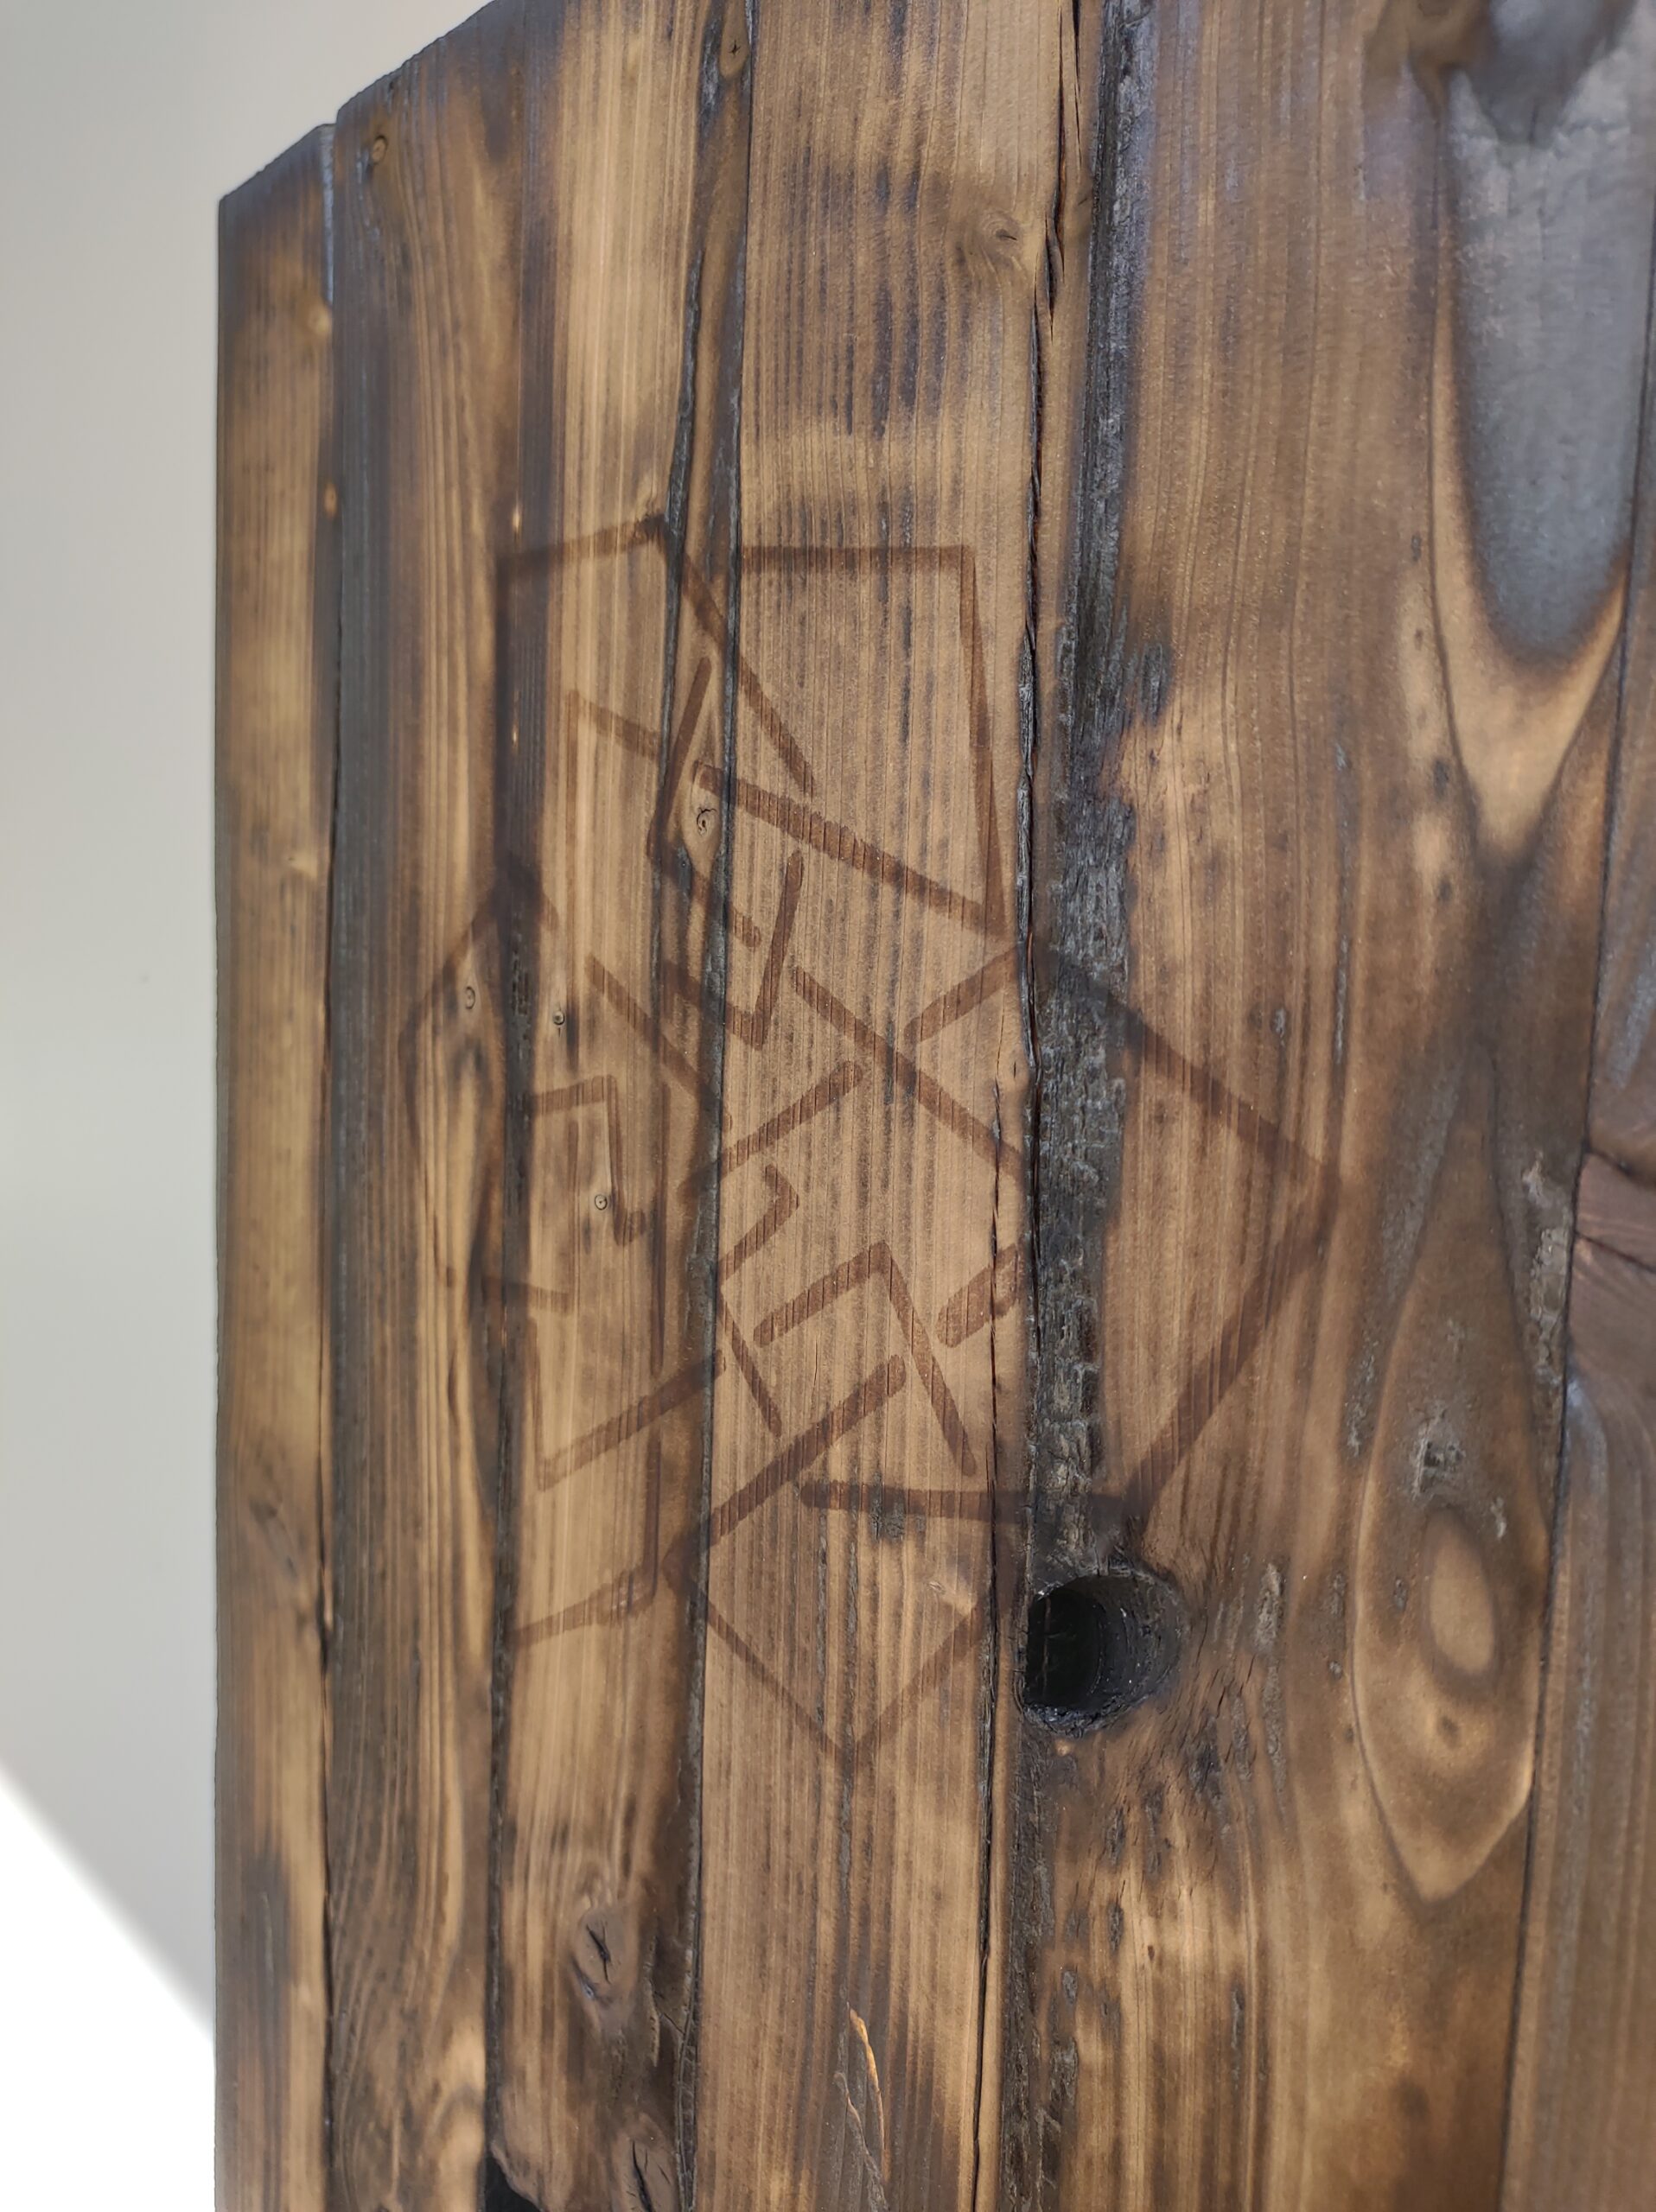
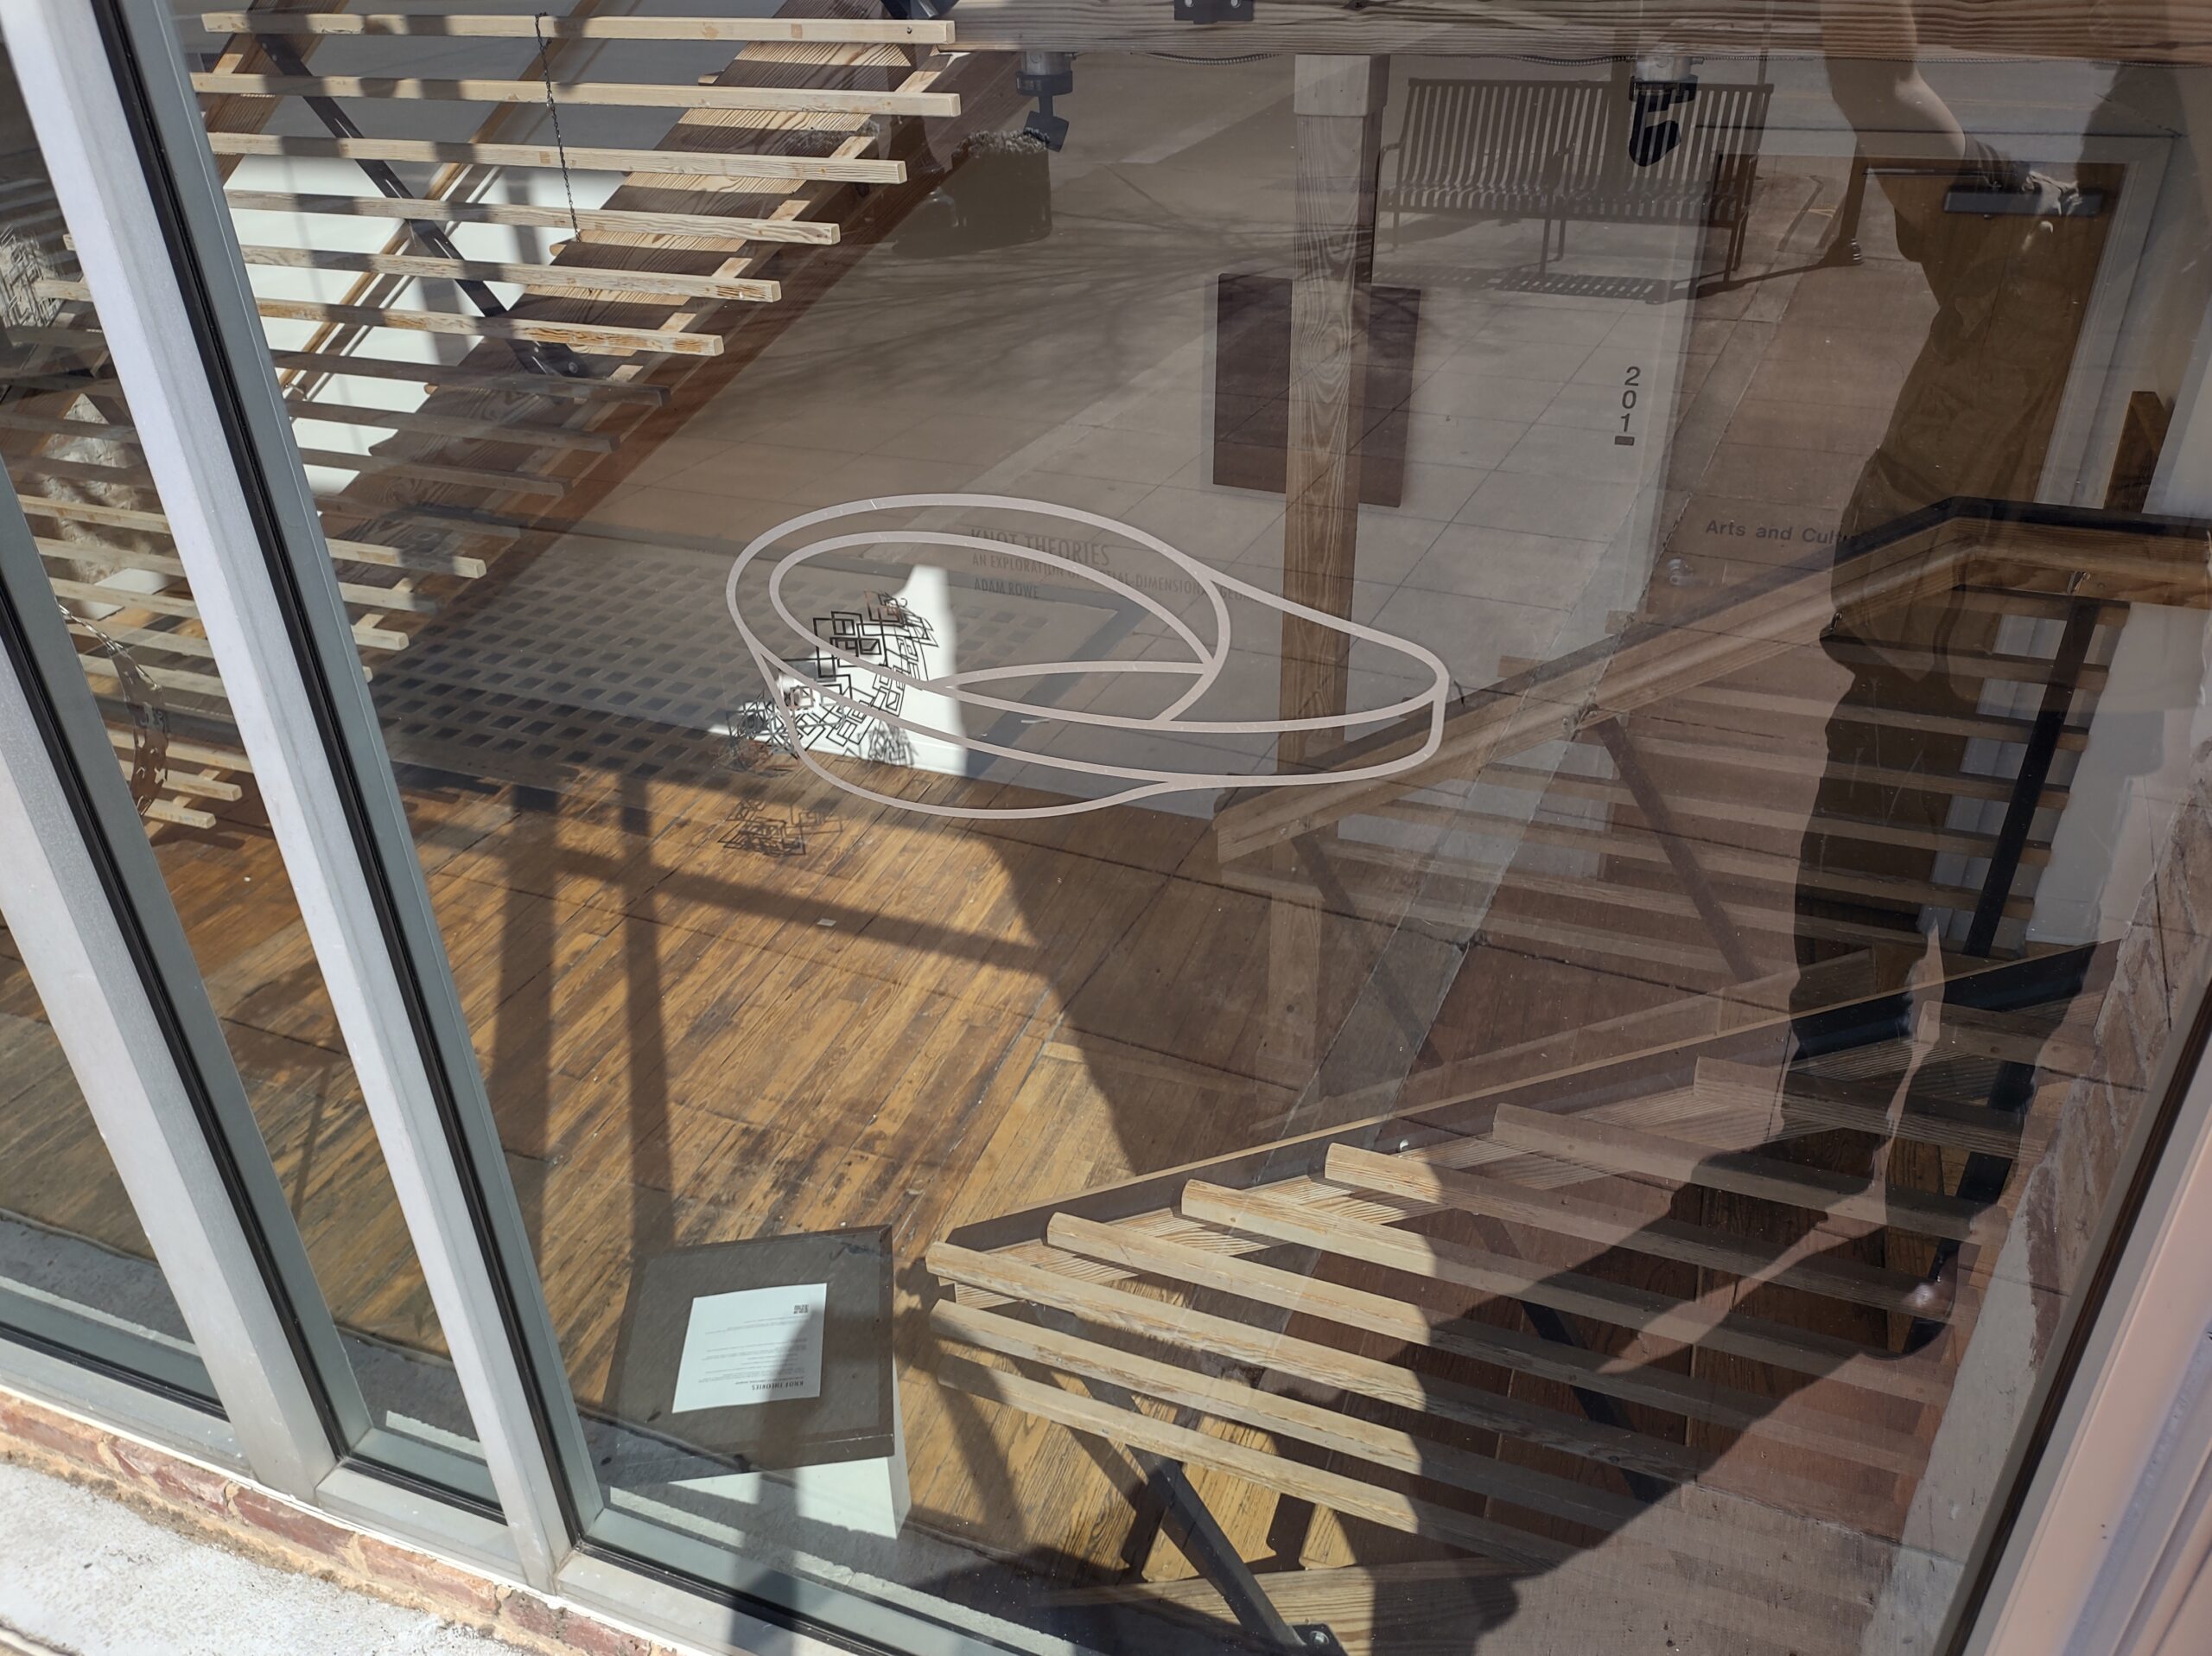
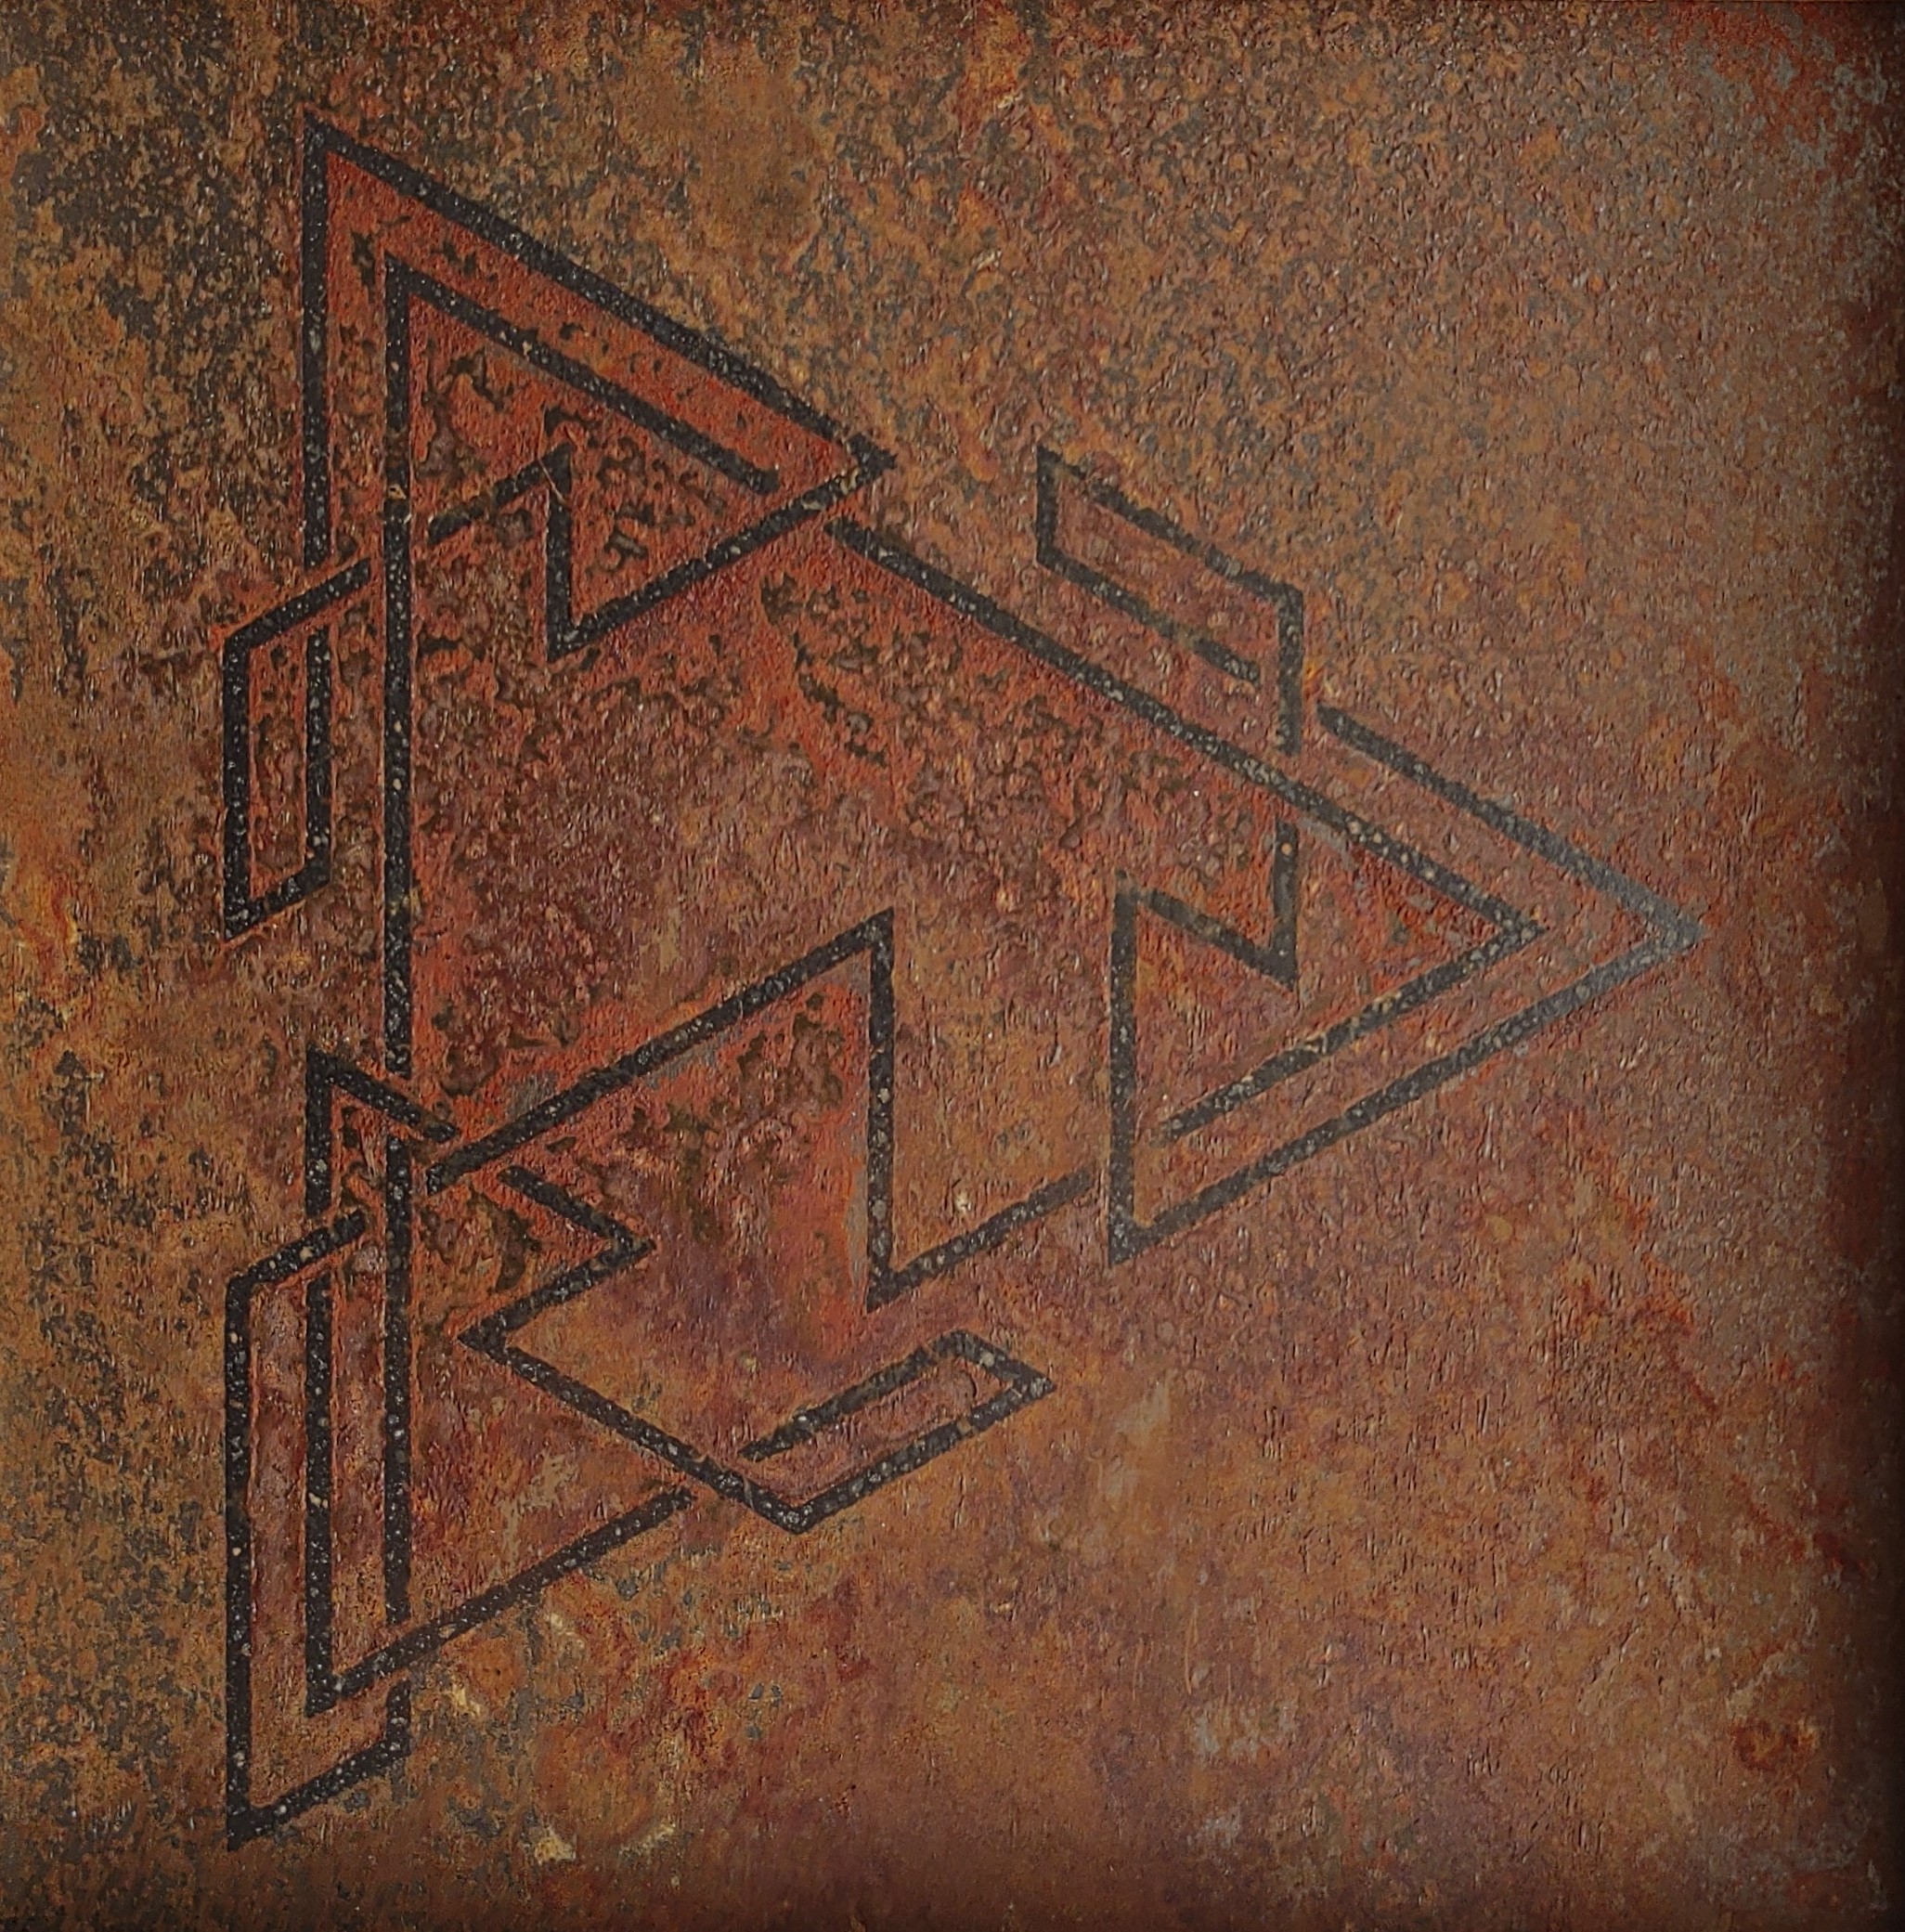
    I chose this knot as one of the representative symbols for the gallery window as it clearly shows the basic rules of knot creation: 1) an alternating over / under pattern 2) with no angle corners intersecting lines and 3) radial symmetry.

    Here is the same knot, just for fun, graffitied on metal.

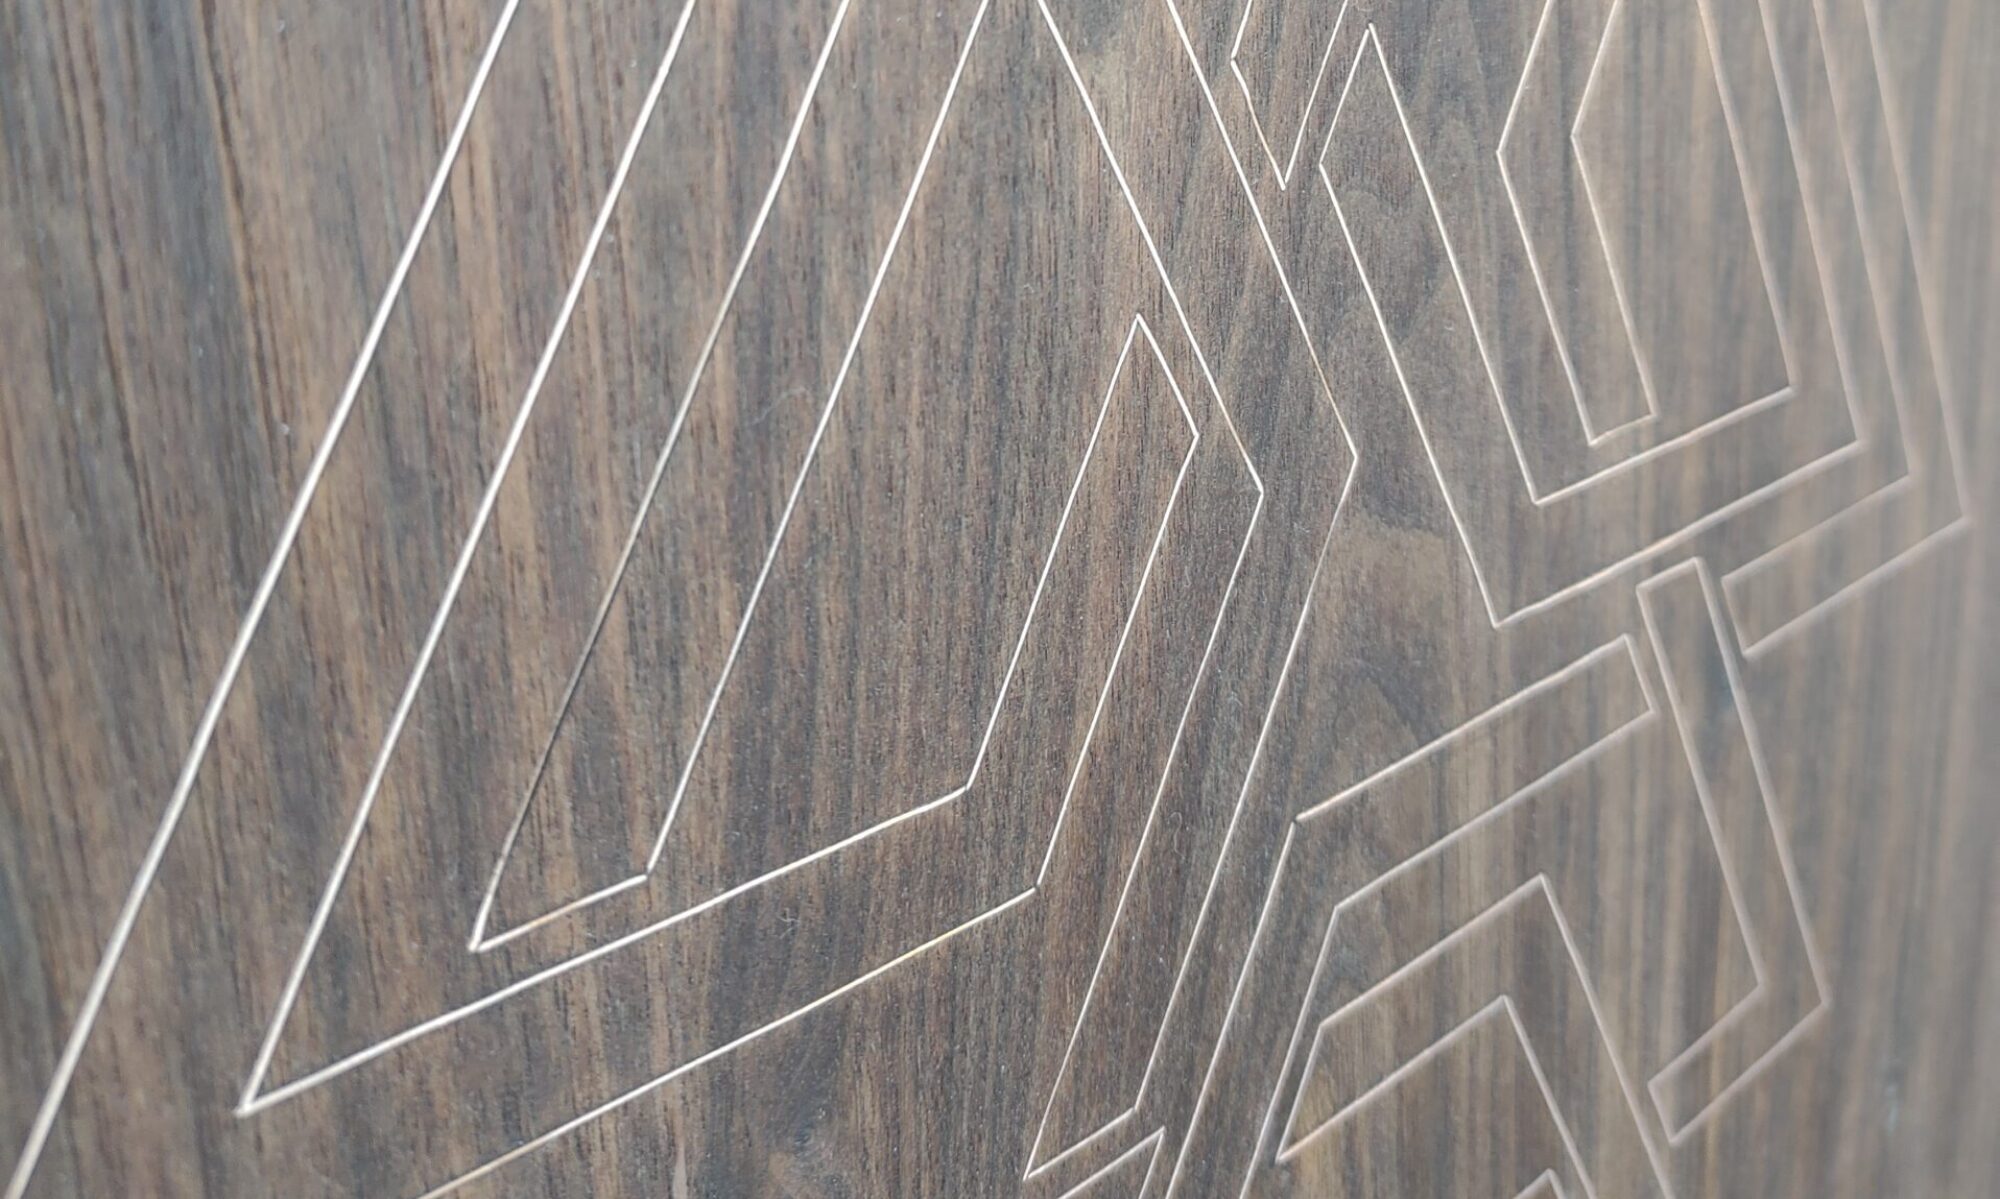
    The final piece was done on charred wood with a technique which makes the knot visible only at certain angles and certain lighting conditions (chatoyancy). In direct sunlight, the knot is barely visible until a shadow falls on it.

    The position of this piece in the gallery actually lines up with the window at a certain angle from outside.

    This is what it looks like under a blacklight.
  • triple knot listing band

    triple knot listing band

    A knot can be infinite in terms of translation if its left edge lines up with its right edge. That means that a knot can surface a cylinder. But, what about a non-orientable surface?

    If a knot (segment) is created so that its upper right lines up with its lower left, and the segment is repeated an odd number of times, the whole unit can surface a one-sided surface.

    Here is a maquette of a solid (flattened) version of a knot as a Listing band.

    This one shows the 3 individual knots more distinctly:

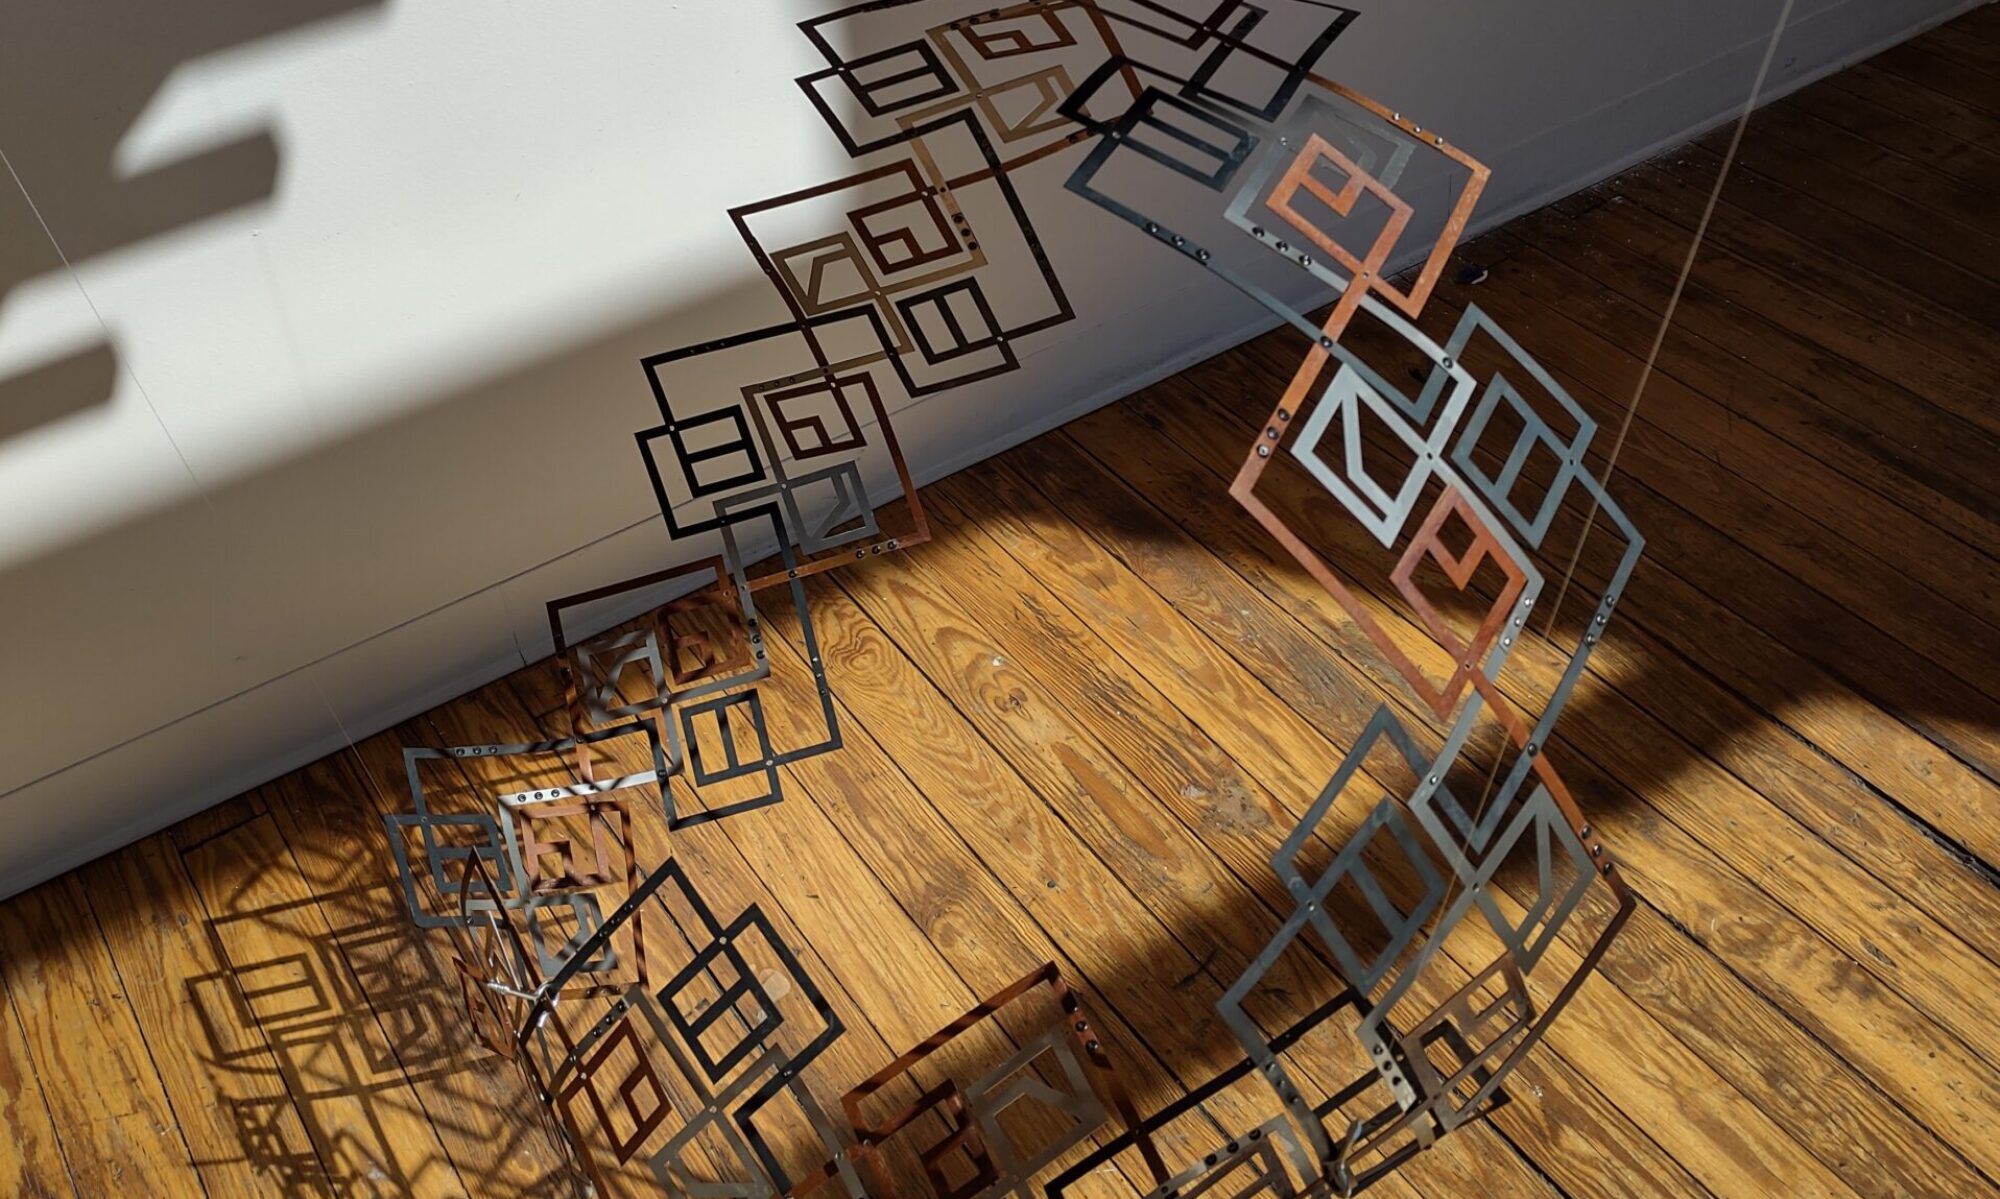
    Once again, look at those shadows! In this example, I could have chopped up the knot to give the illusion of lines going over and under other lines, but the end goal was to make something solid, where this one was simply printed on acetate. I actually started wondering if I could somehow encase a material in something clear so I could make a much heftier version and still have the over-under implication, but I ended up going with something much more down to earth. Metal!

    The pieces were designed with three holes at the end of each segment so I could pop rivet everything together and everything would self-align.

    I liked the colors I picked for the maquette, but I wasn’t about to paint anything when metal can look so amazing and varied just by using harsh chemicals. After degreasing and shining everything up, I applied a clear sealant for the blue line, gun bluing for the black, and rust juice for the red. Note the lack of photos of bluing the metal because I was scared to death I would poison myself.

    I waited to do the final assembly until just before I was ready to display it to avoid the possibility of damage. It’s very delicate for something made out of braided metal.

    the final piece installed along with the bonus of really nice shadows
    probably the final chapter in this piece’s life: turning it into a chandelier for our dining room
    another added bonus: a serendipitously projected rainbow on the wall
  • translucent listing band slice stack

    translucent listing band slice stack

    computer rendering of the encased band

    Perfectly symmetrical listing bands are difficult to display because of one of those things that bring us all down, like gravity. But, if you could slice one (or really anything that’s hard to balance) up, you could stack the slices and create the illusion of a dimensional solid.

    This a test using glass. It’s unreasonably heavy.

    Being able to view this from multiple angles makes a lot more sense:

    The first version, shown in this video, is made up of 40 pieces of glass, each with a cross-section of a simple listing band. The mind does its wonderful job of smushing and the illusion of a thing, as opposed to just a stack of lines, appears.

    test pieces shapes painted on, lounging together on a couch

    The final piece was 80 10″ x 10″ pieces of Plexiglas (which I learned allows for more optical transmission than glass) each with a different shape painted on its surface. The frame was made from busted Chinese chestnut, which I think contrasts nicely with the pristine precision of stacks of thin lines.

    a couple of tests for the wood enclosure

    This piece sits outside the main gallery because I wanted it to be an introduction to the rest of the pieces: its design is much simpler but its implementation invites the viewer to look closely to find out what’s really going on.

    One thing I find fascinating about this shape is that it is the same as the symbol on the window. It just looks completely different from every angle.

  • collapsible scale listing band (deconstructed)

    collapsible scale listing band (deconstructed)

    The two things you don’t want wood to do are bend and twist. The two things listing bands do are bend and twist. Is there maybe a compromise?

    a maquette of the original design. this thing is very small.

    If alternating cuts are made in opposite sides of a piece of wood (or any rigid material) the material can more or less bend. Of course, the material itself isn’t bending as much as the overall bend, but it averages out to a much greater bend that would be possible without the cuts.

    The same applies to twisting.

    this is more or less half of a band, but it shows what’s necessary for a twist-bend combo
    a gathering of tests made from various materials, enjoying a picnic on the lawn
    my notes for this project

    The horizontal spaces allow for twisting and bending to happen.

    Notice how the top and bottom fit into one another. This maintains the vertical translation during scale chirality alternation.

    A wire was to be placed as a connector as shown here.

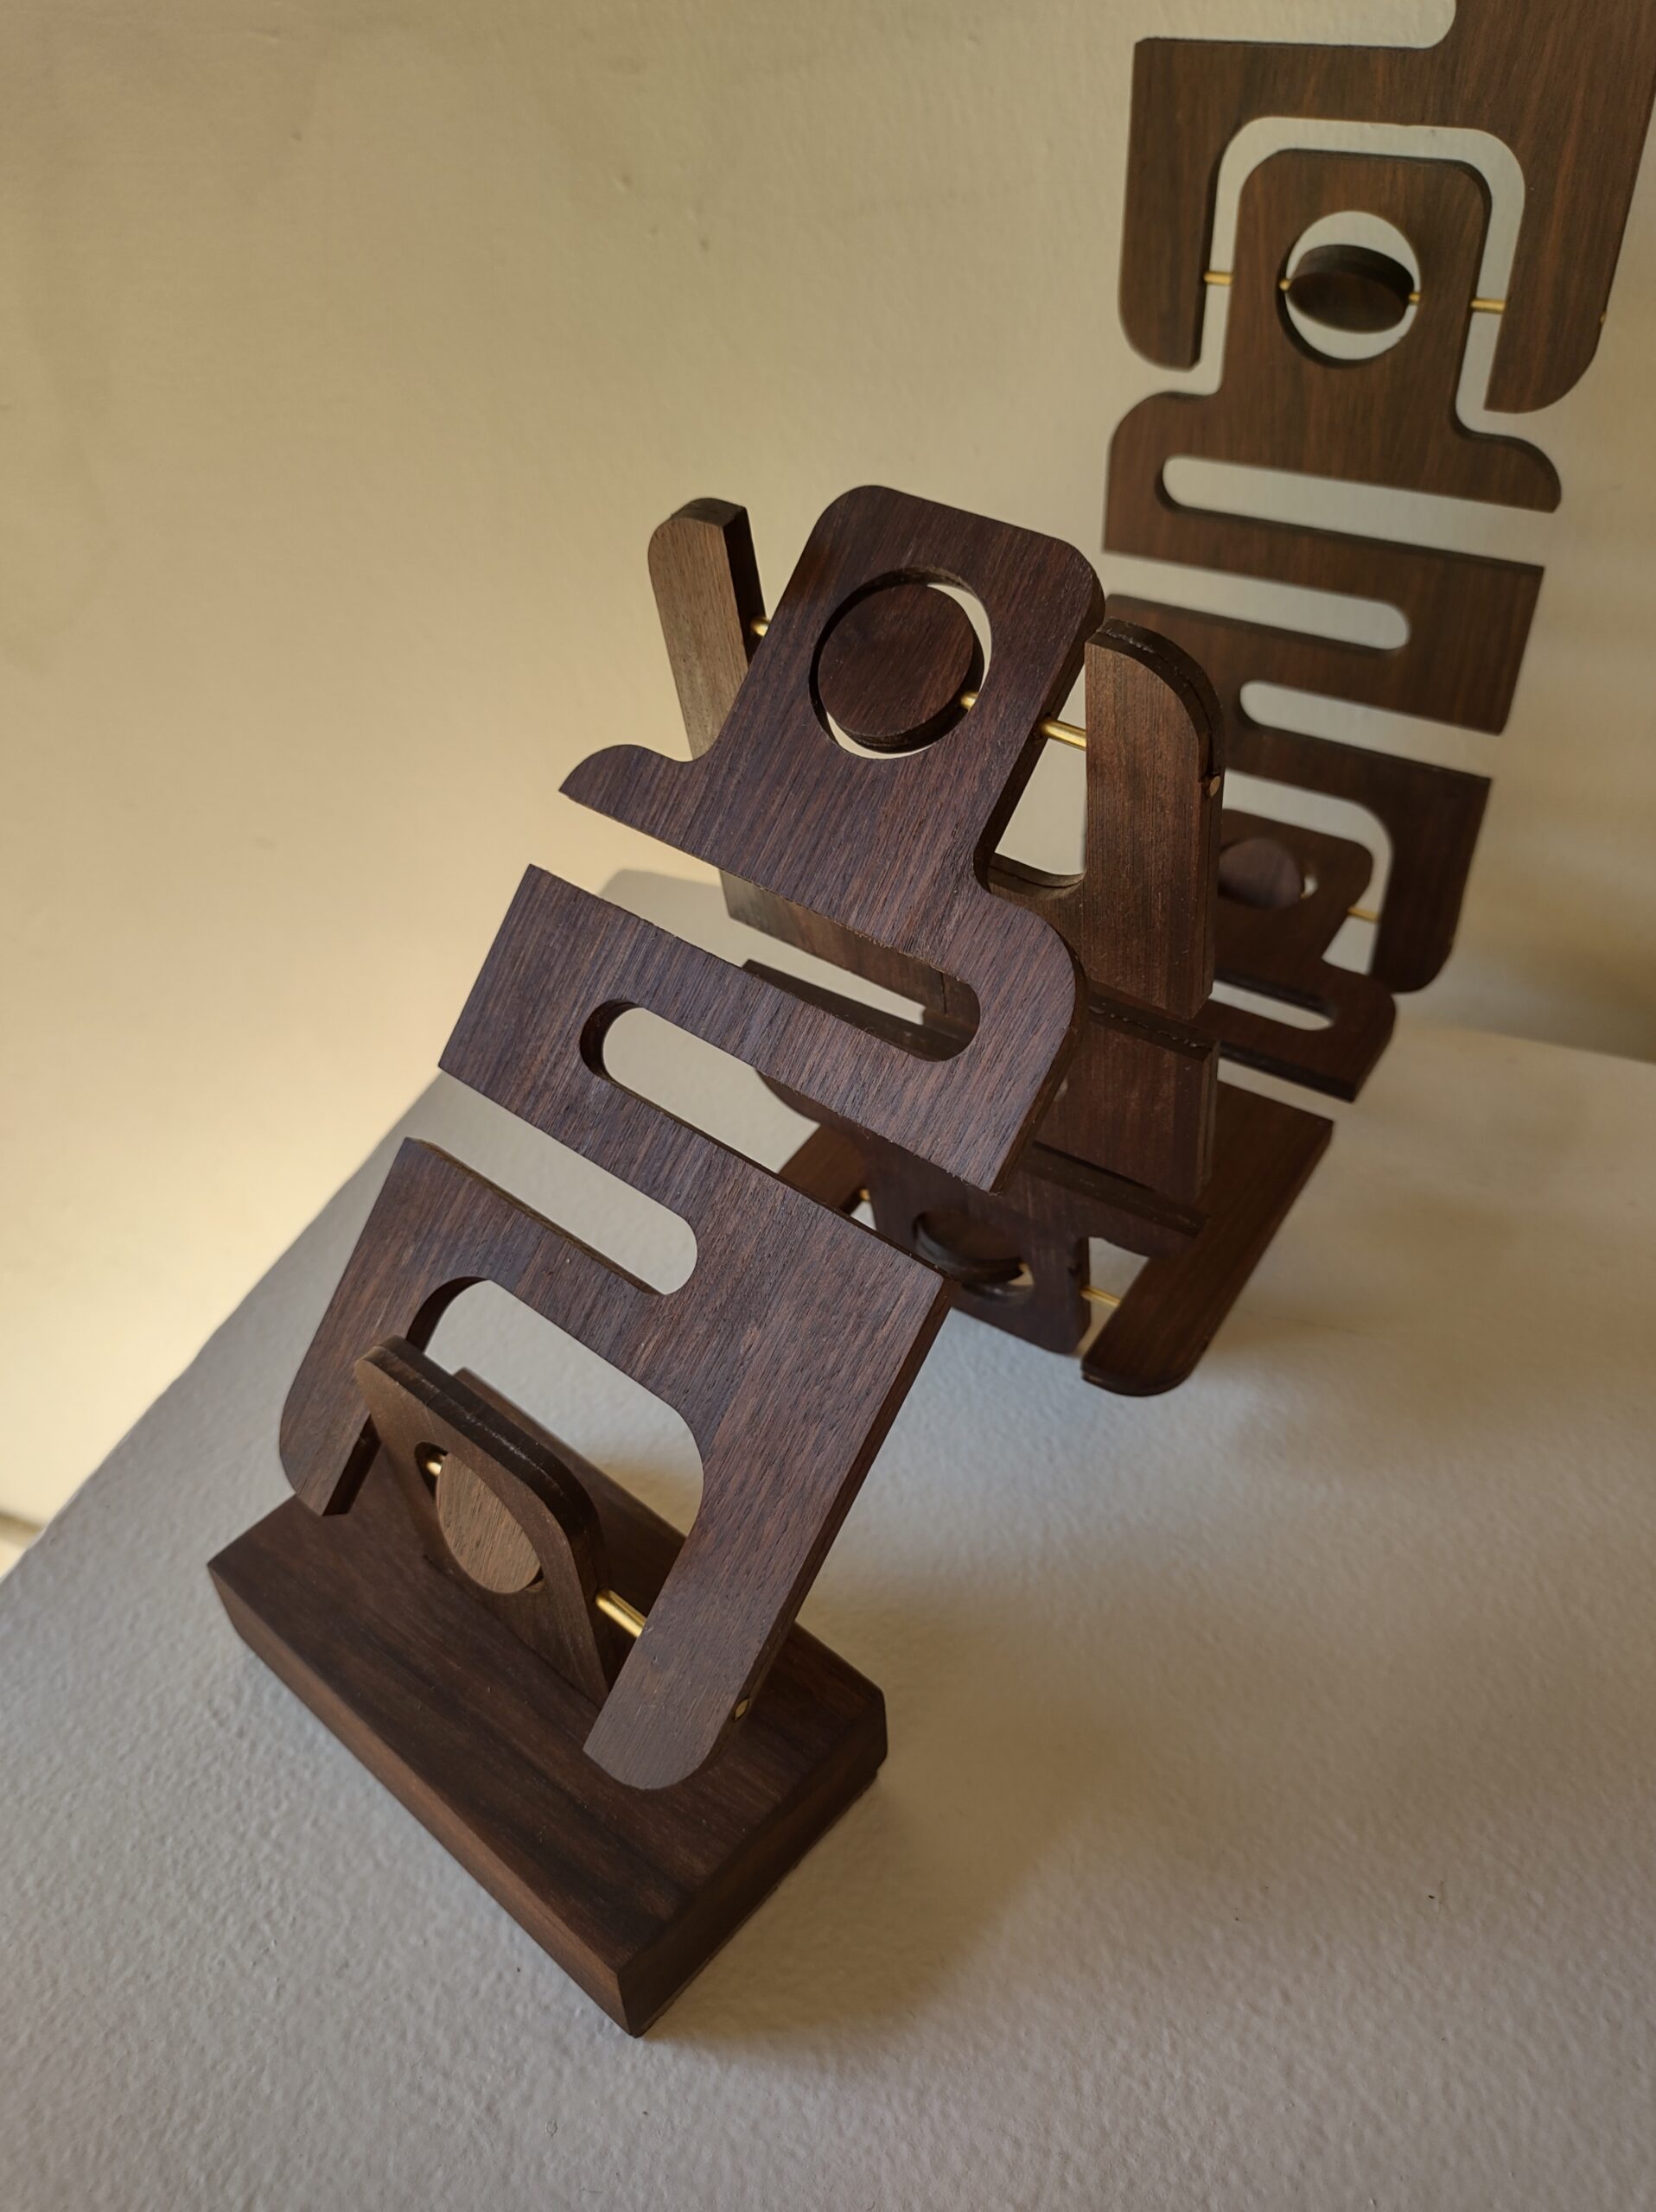
    I thought a nice touch would be the floating circle in the “head.” Because drilling holes that lined up through a piece of wood thin enough to twist-bend would require a Hanukkah miracle, another solution was to rout out a curved groove half way through mirror images of the scales. Then the wire could be placed in the groove and the wood laminated together.

    I CNCed a template which I used to trace on the wood…

    …drilled some holes to make life easier…

    …and went to the band saw. There were casualties.

    the robot gingerbread man infirmary

    Then I used an edge trim bit and the original template to clean things up. I actually designed the whole thing based around the clearance I’d need for the bit to clear the interior zig-zag shapes which was nerve-wracking to say the least.

    Again, because of the thickness of the wood, I had to treat it very gingerly. To rout the grooves, I made router passes of 1/256 of an inch at a time. It took a while.

    templates for holding the little guys still while I routed the slots for the wire, along with one fancy boy made out of cedar

    But it was worth it!

    When I saw the way the scales looked linked together, I liked it so much that I wanted to show them like that instead of contorted into a band.

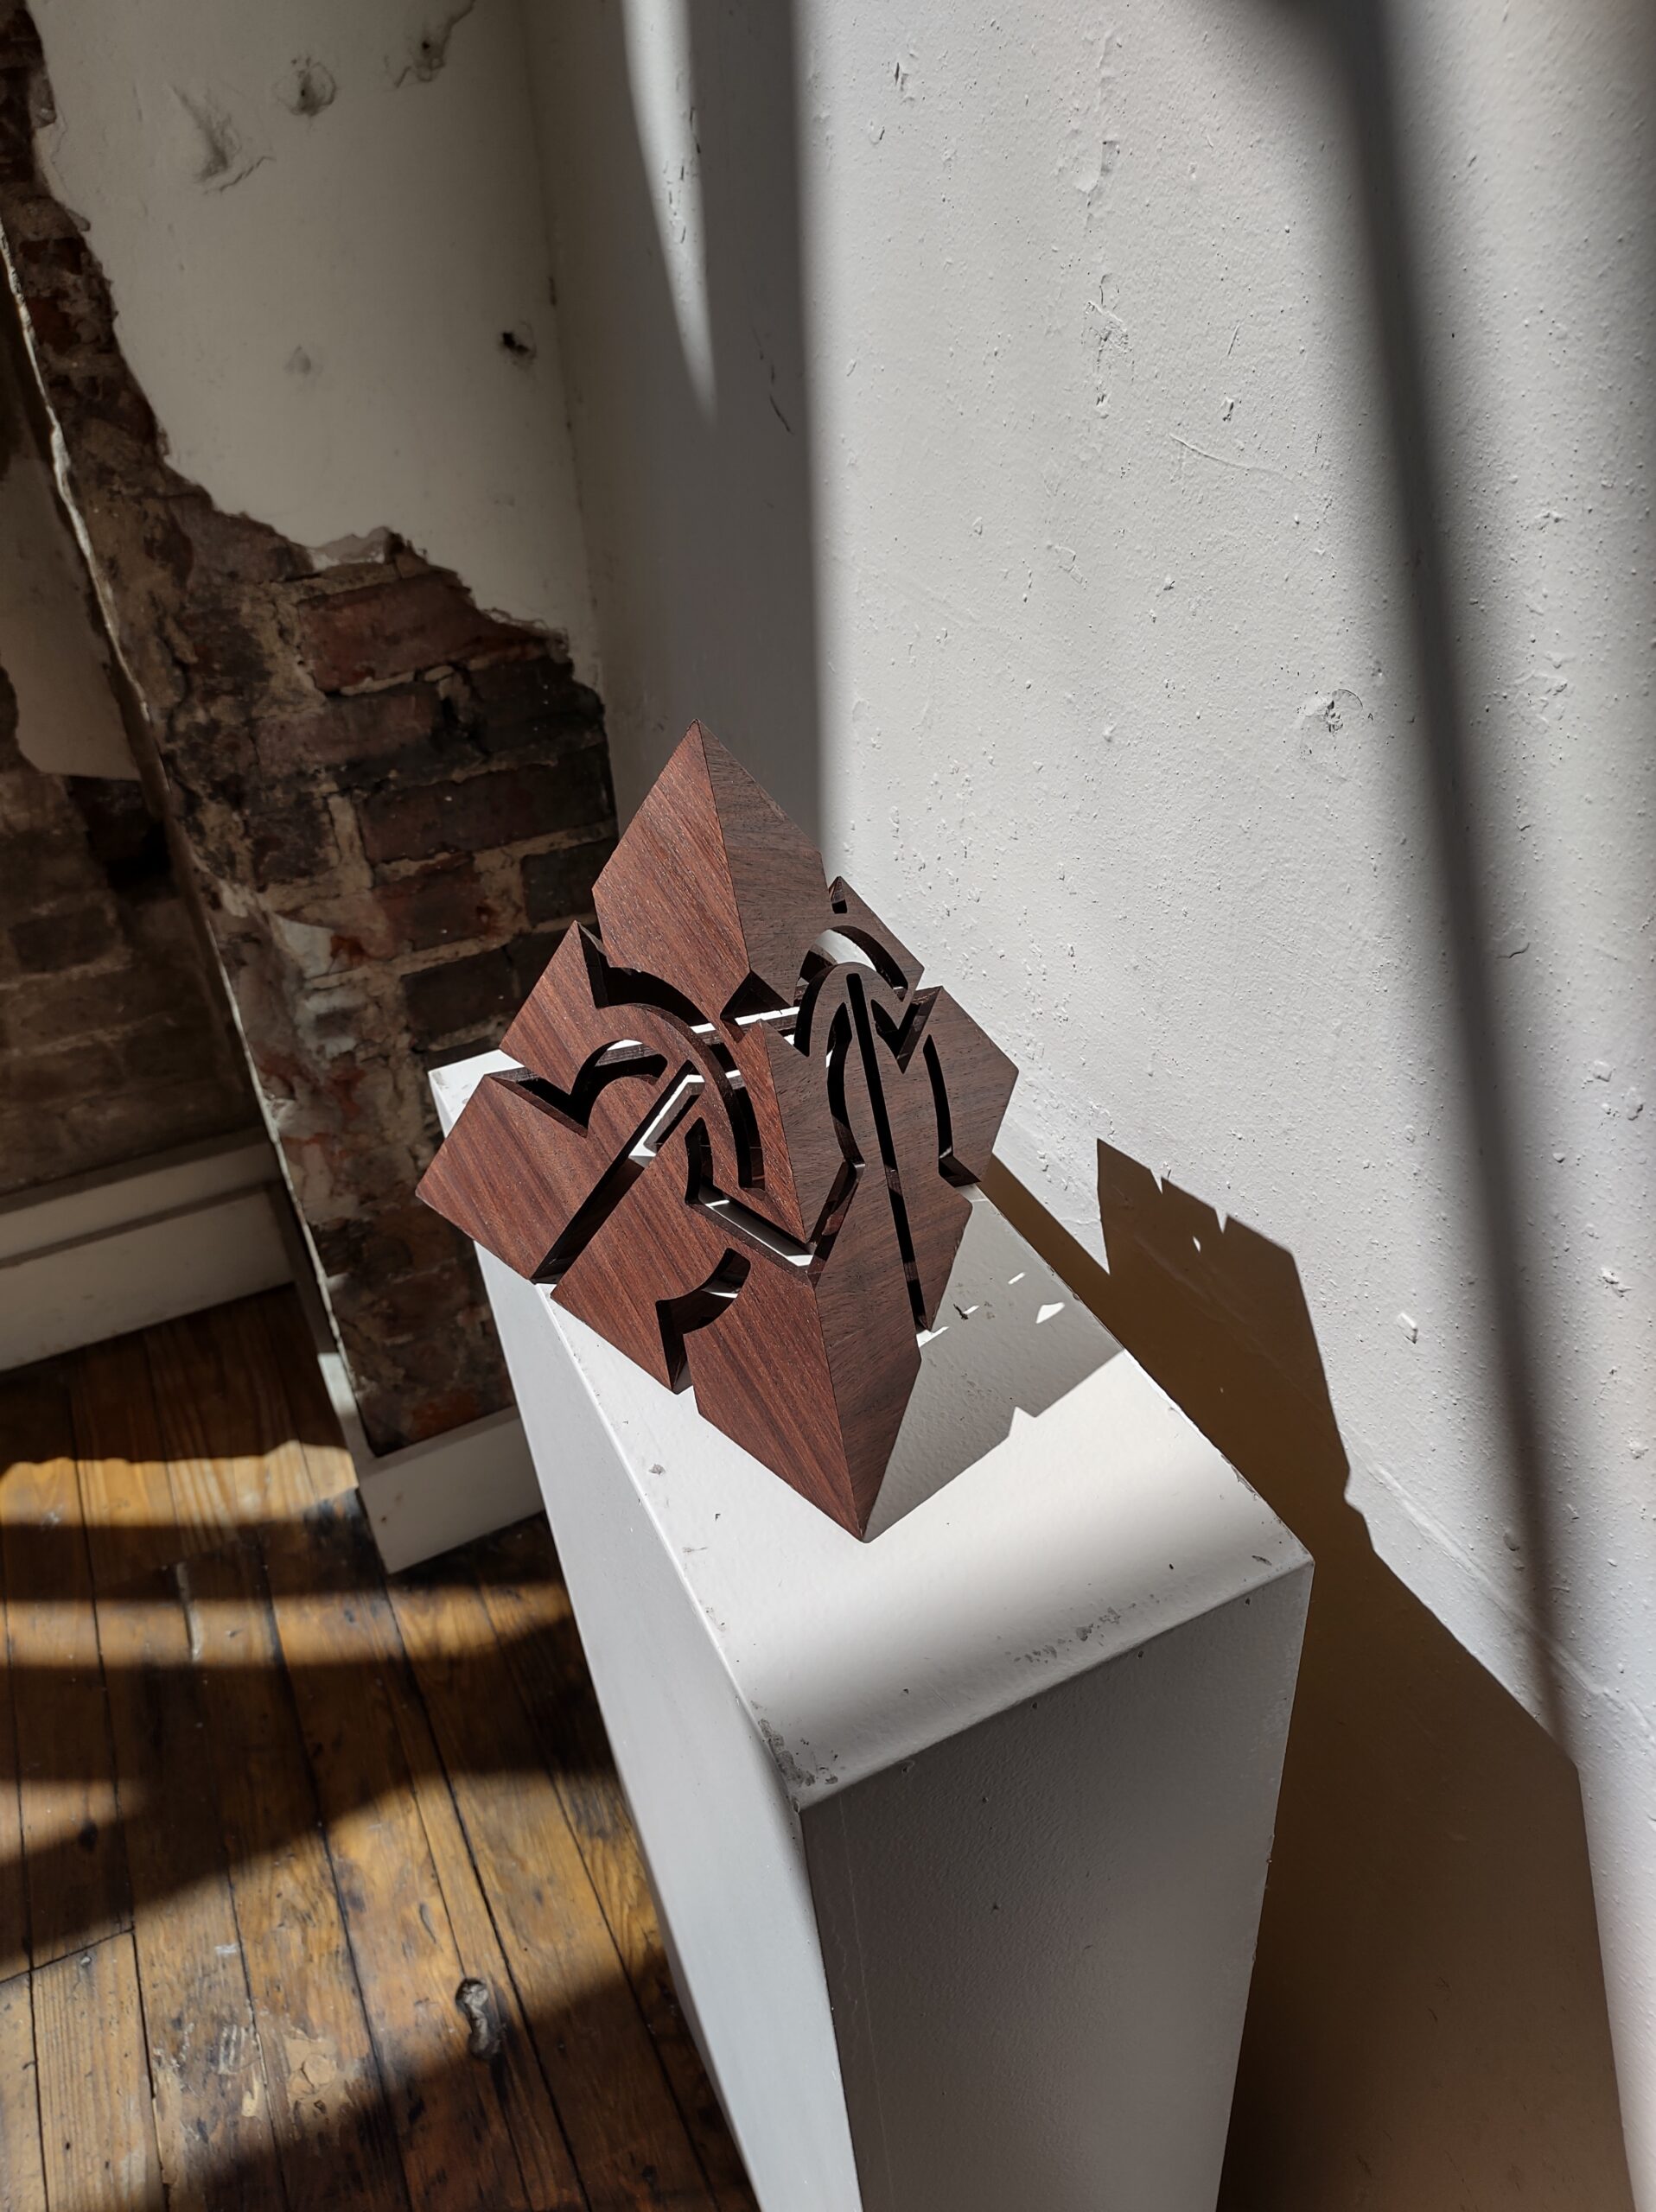
  • reversed metatronic solid (hexahedron)

    reversed metatronic solid (hexahedron)

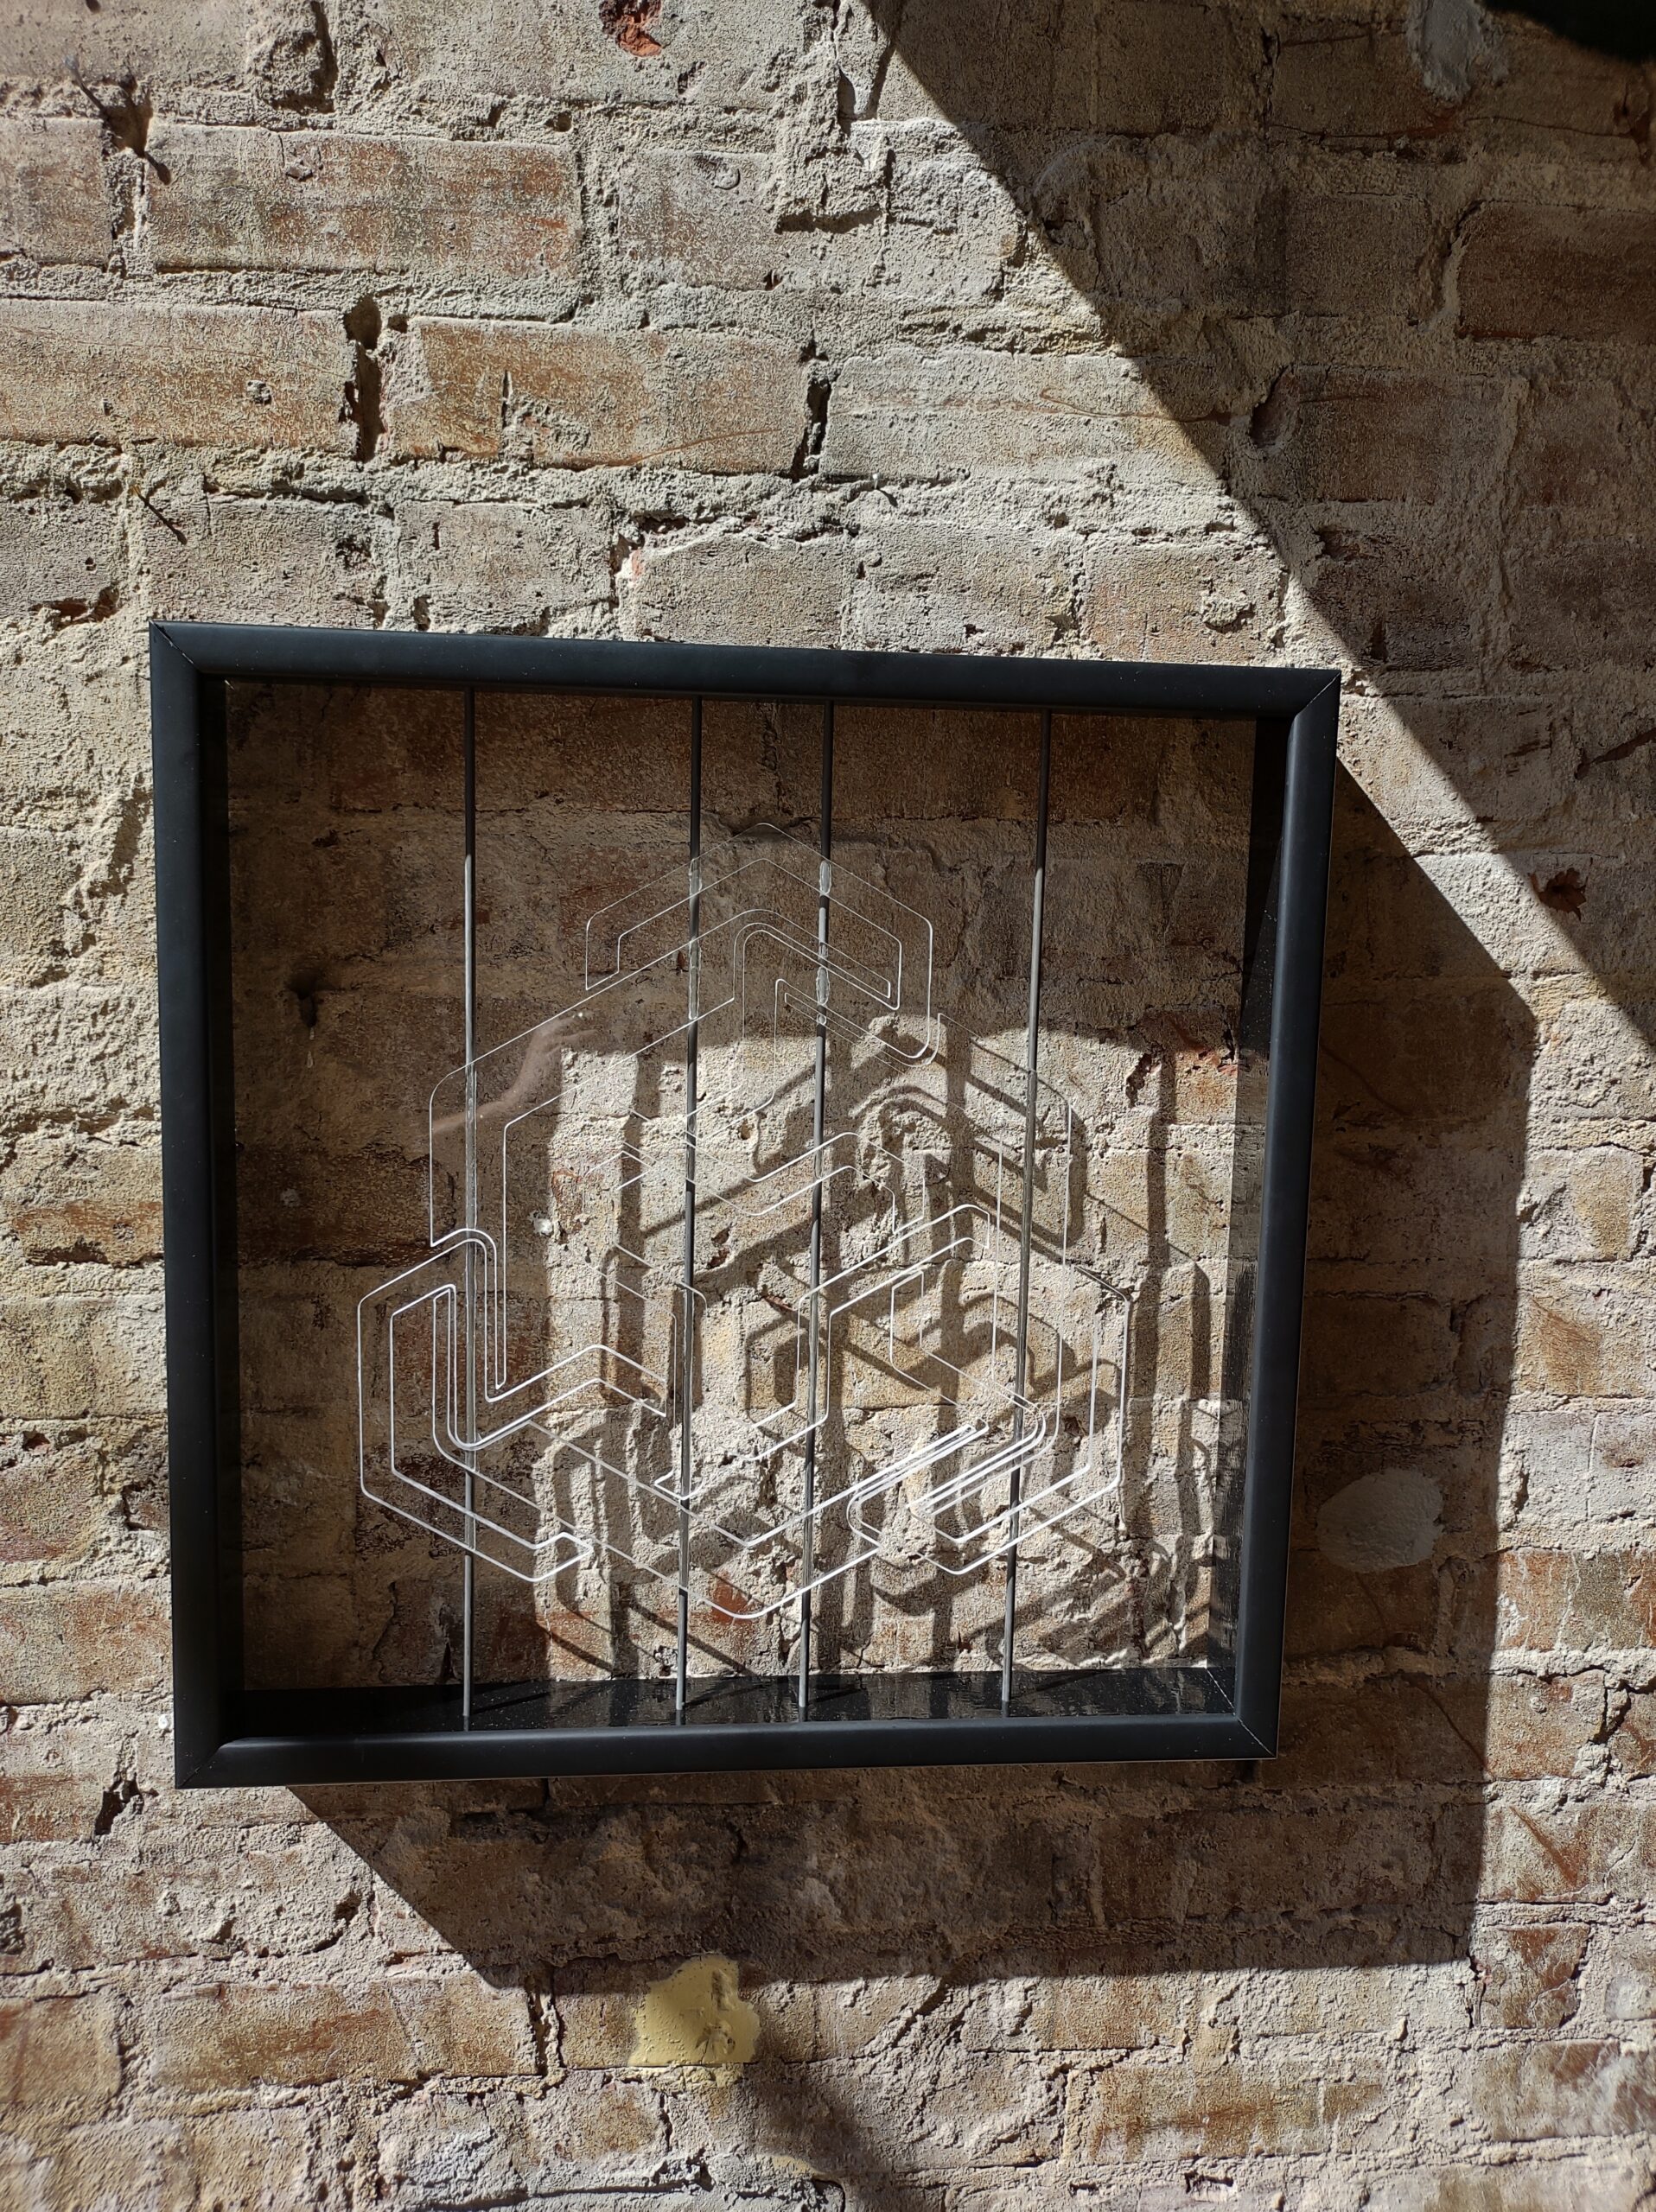
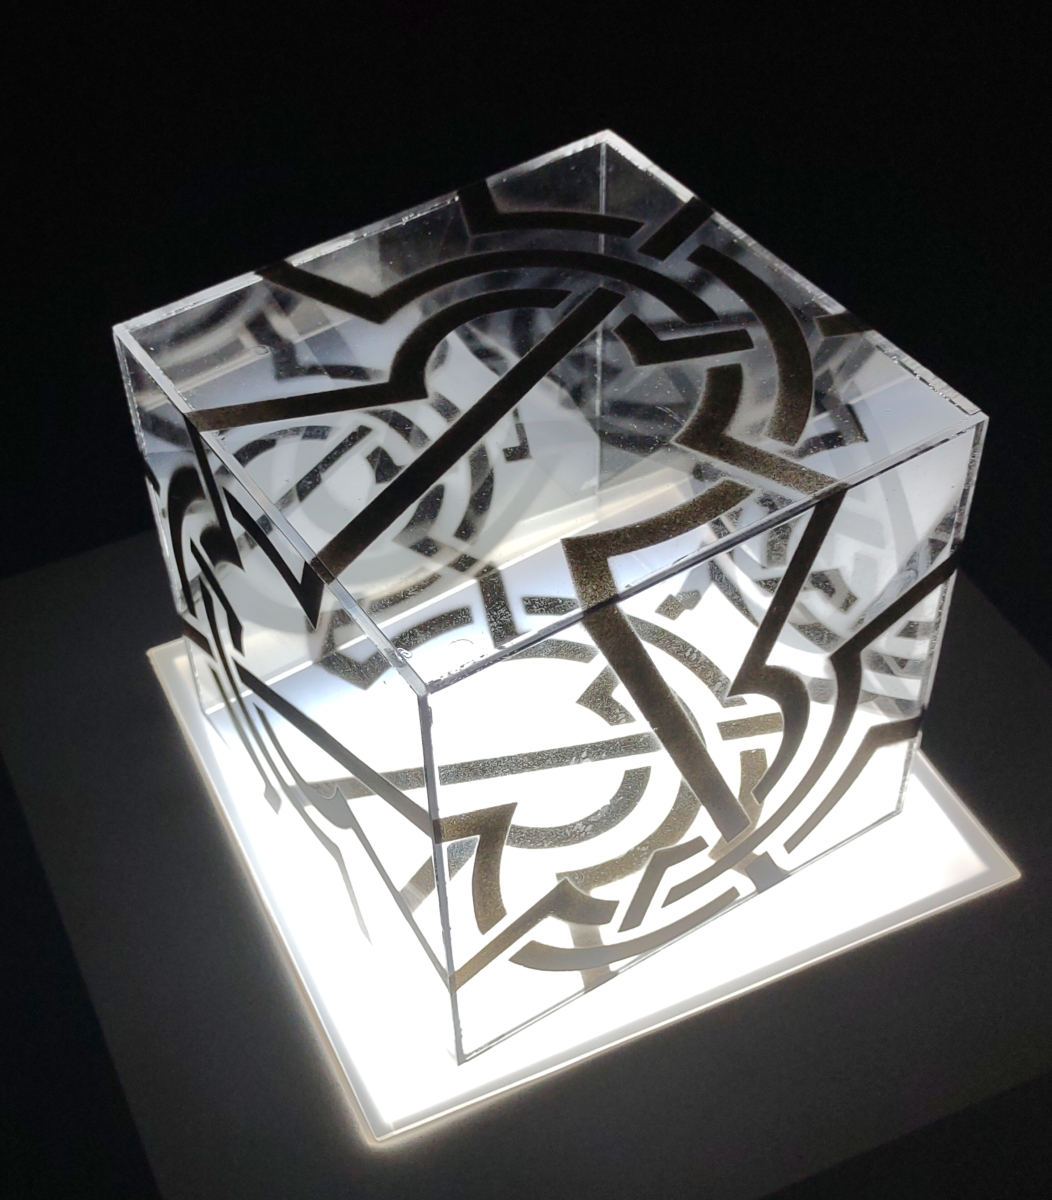
    The metatronic knot on a solid surface has to be “knocked out,” but is there a way to show the inverse? The not-knot? With an opaque material, not really, but with a translucent medium, not only could you show the knot counter-spaces, but you could view the inside and outside simultaneously.

    This piece is best viewed with abundant sharp light such as sunlight.

    Sculpture usually has to make a compromise because in anything but zero gravity, it has to rest on something. This means you don’t get to see what’s on the bottom. An artist isn’t likely to put something interesting in a place no one can see. In this case, I wanted to make sure a viewer saw how the knot pattern worked out on all six sides, leaving nothing to doubt.

    Something of added interest: the pattern used in metatronic knots works regardless of rotation; any of the faces can be rotated and the knot pattern still works fine.

  • metatronic solid faces

    metatronic solid faces

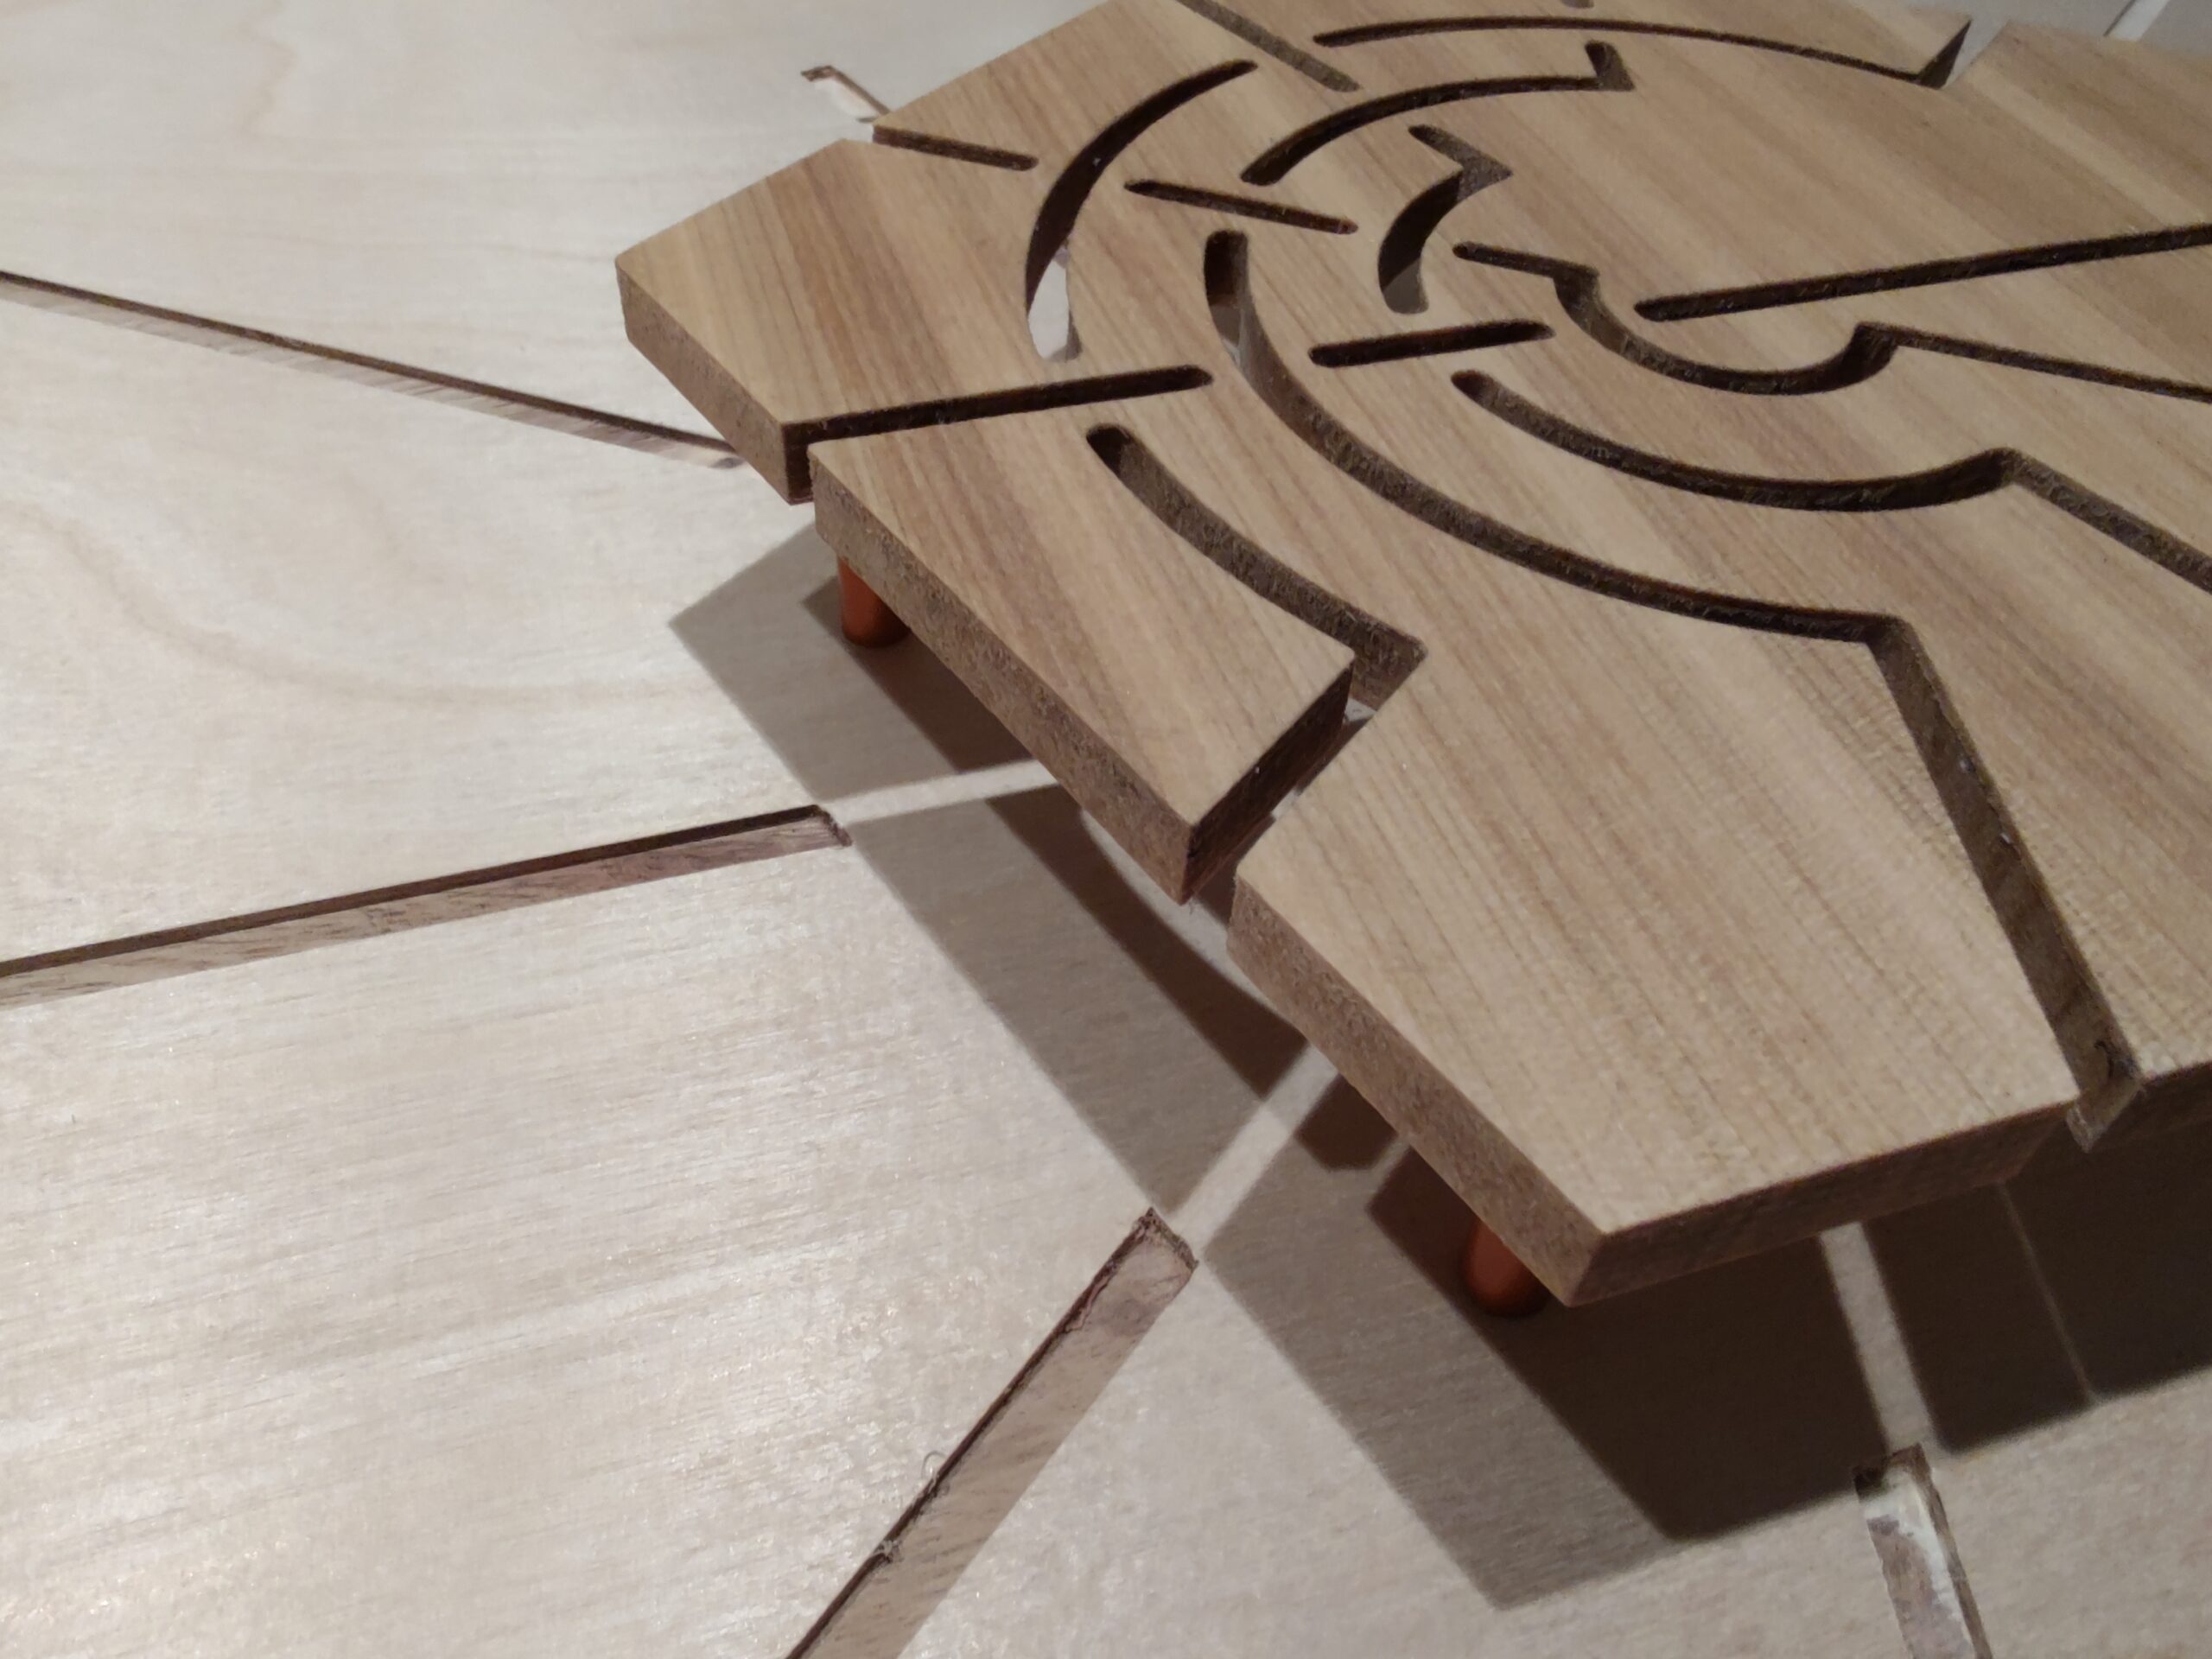
    Although the main challenge of creating the metatronic solids was applying knot patterns to regular polyhedra, each face was interesting itself.

    The first iteration of the faces was the hexahedron. I thought would be fun to use the face of a hexahedron, a square, to create a cube, but by stacking copies of the face instead of rotating them along their edges.

    For the next version I focused on just one face, a triangle from a tetrahedron. I used gold leaf poles to elevate the shape off of the background.

    The radial lines in the knot design were emphasized by darker wood in the background.

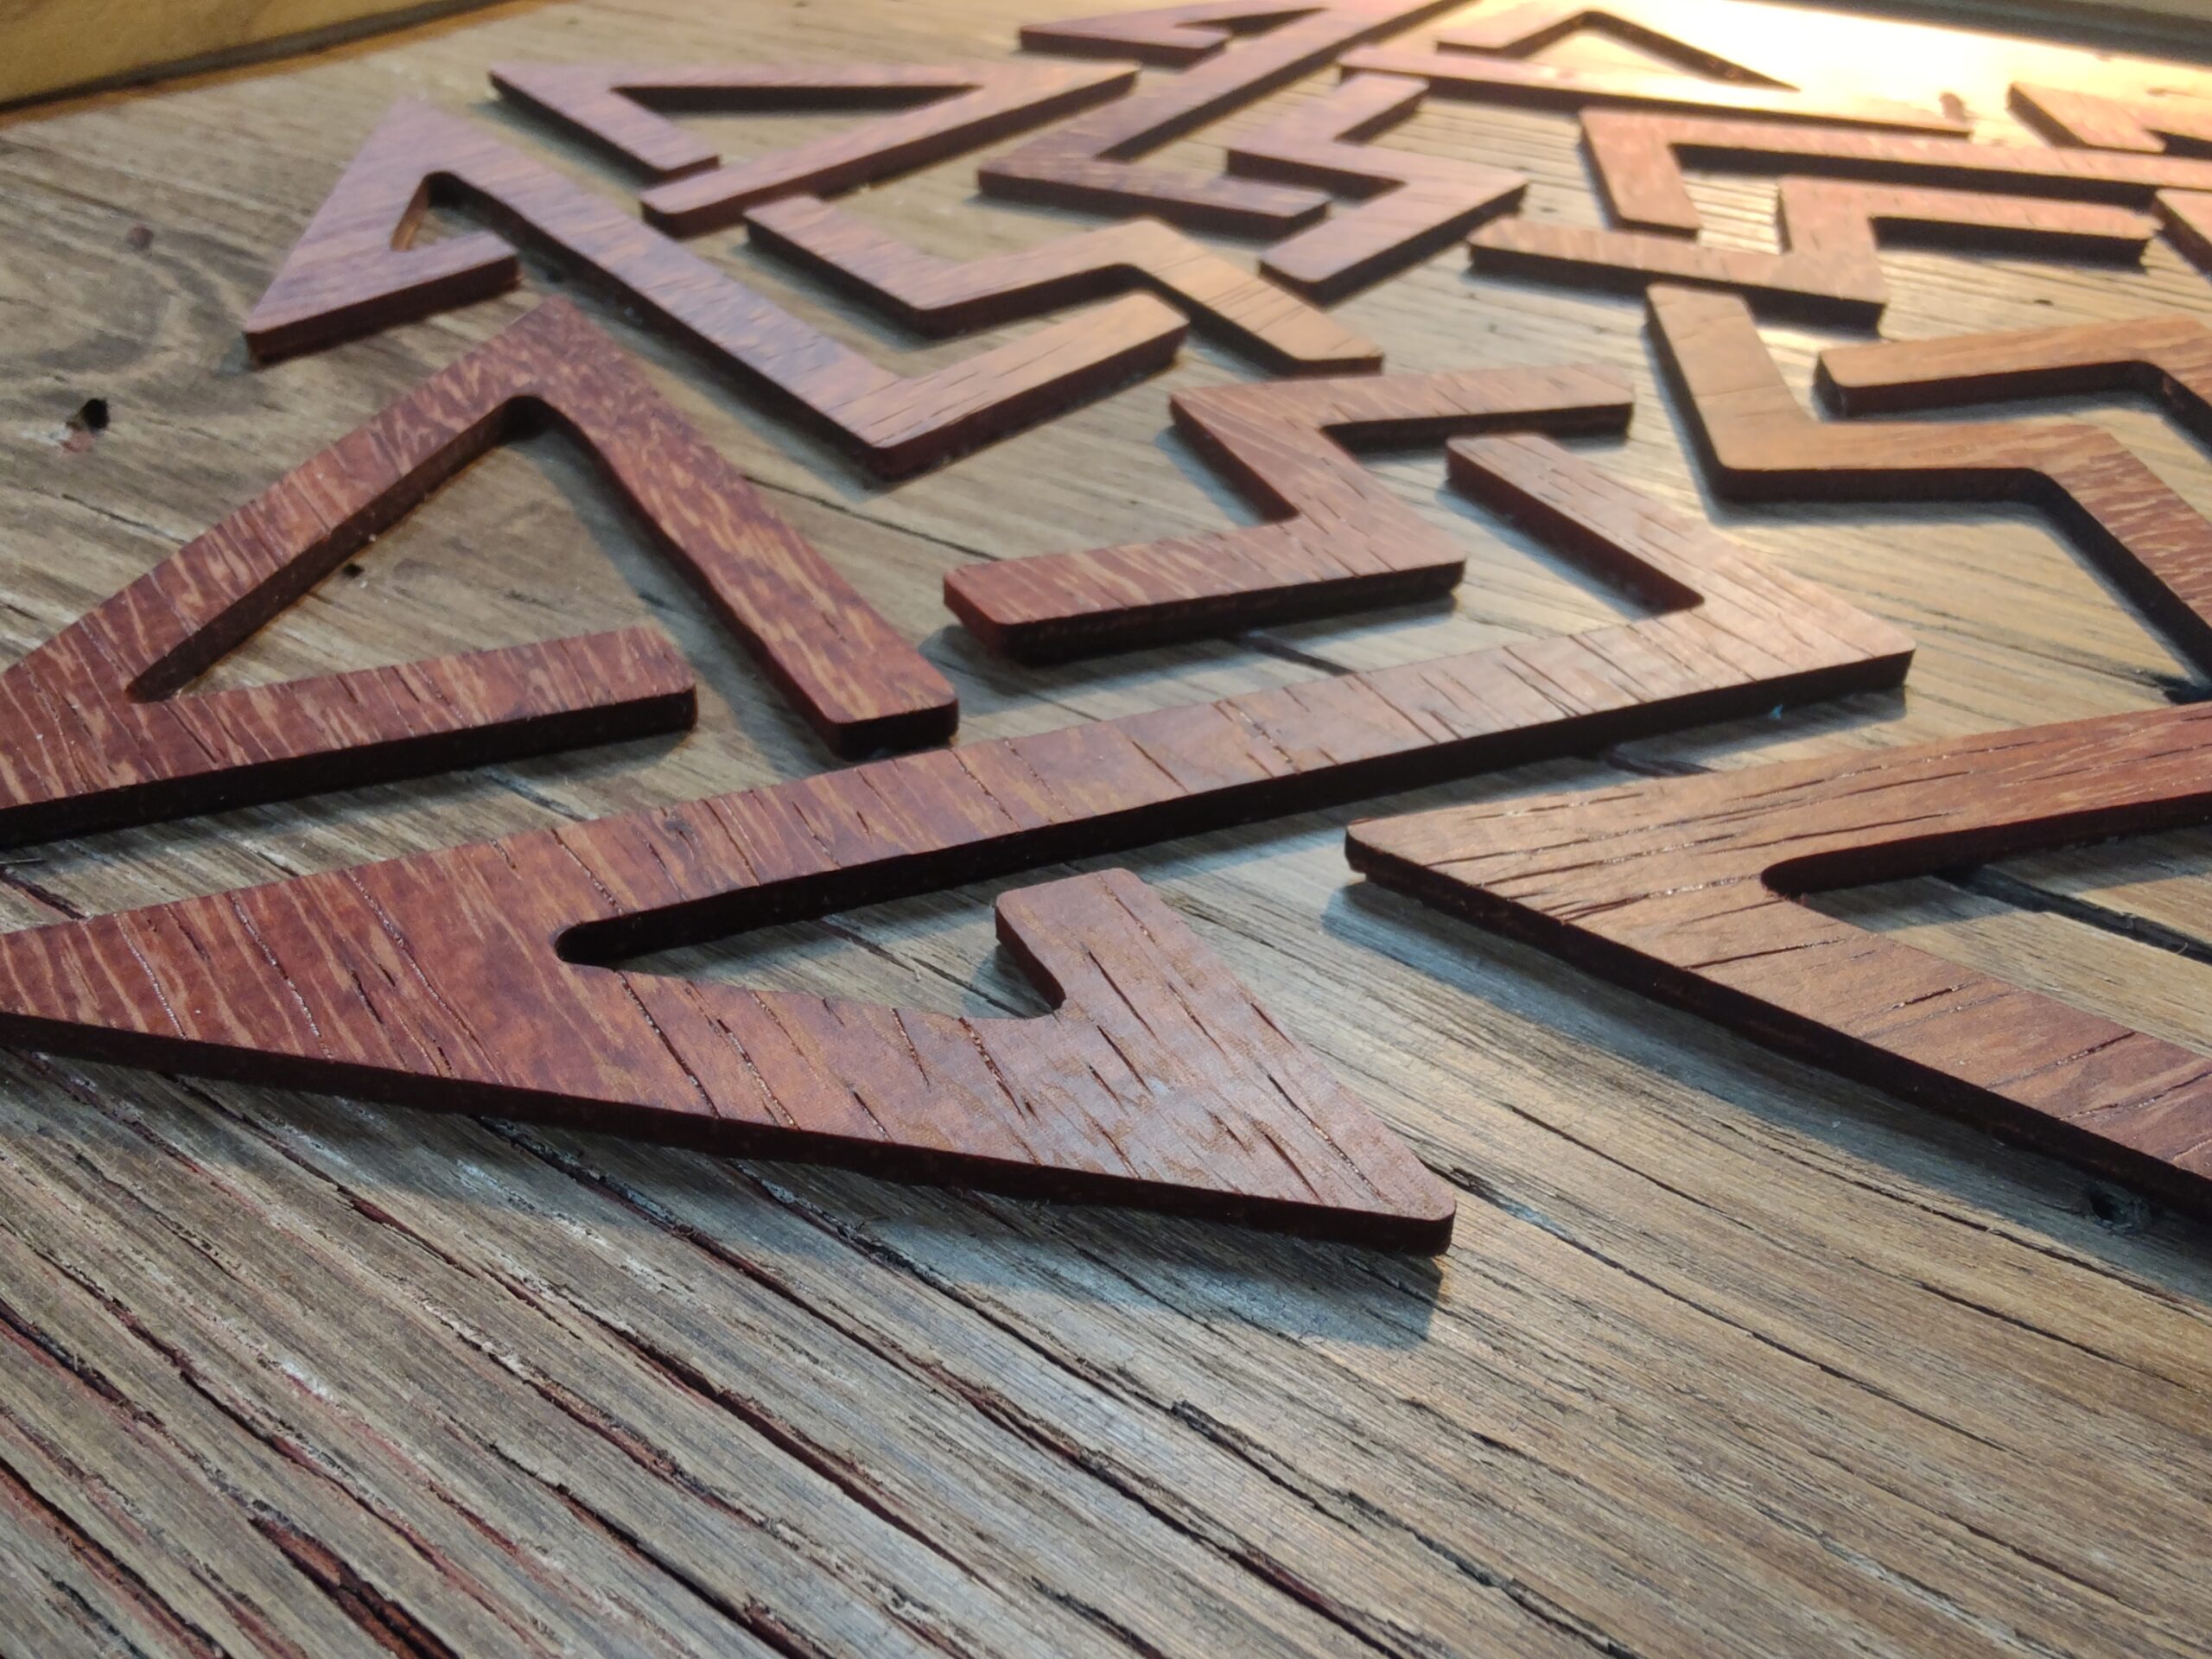
    The dodecahedron face, a pentagon has many more radial lines. They were inlaid with a contrasting wood.

    this angle is probably hard to see in real life. it shows the anodized aluminum poles which support the face.

    There’s one more of the square / hexahedron. This one was a little more involved, so there’s a separate post devoted to it.

  • metatronic solid (tetrahedron)

    metatronic solid (tetrahedron)

    Three lines make a reversed knot pattern covering all faces of a tetrahedron, regardless of rotation (this same pattern can tile a plane).

    The first in a series of polyhedra shells based on this concept, taking its name from Metatron, a figure associated with the geometry of regular polyhedra.

    the face of the metatronic tetrahedron, representing the show
    many attempts using varying techniques
    successful maquette
    the satisfaction of a well-made tetrahedron
    preparing the final materials
  • tercet chain knot

    tercet chain knot

    Outlined paths of three single twists are chained together.

    Even self-intersecting loops (twists) follow the over-under rule of knot creation.

    laying out the pattern on the wood
    The irony of this video is that it basically shows the final stage of gently tapping in the copper, which looks very easy going. Although it is, and very satisfying as well, it’s a long road to get to this point.
  • self-intersecting tercet knots with encompassment

    self-intersecting tercet knots with encompassment

    Three triangular twists are abound together by an encompassing shape echoing the group’s perimeter.

    The way the paper is cut and overlapped gives the illusion that each of the four main components are made of single pieces of paper.

    paper maquette
    veneer maquette
    detail of veneer maquette showing overlaps
    staining veneer
    flattening veneer

    You have to cheat a little to give the illusion of self-intersecting lines made out of a single piece of paper….

    some notes and materials testing
    the finished piece hanging in a gallery
  • encompassed unicursal tercet knot

    encompassed unicursal tercet knot

    A hexagonal ring bound to another triply-twisted ring is suspended vertically.
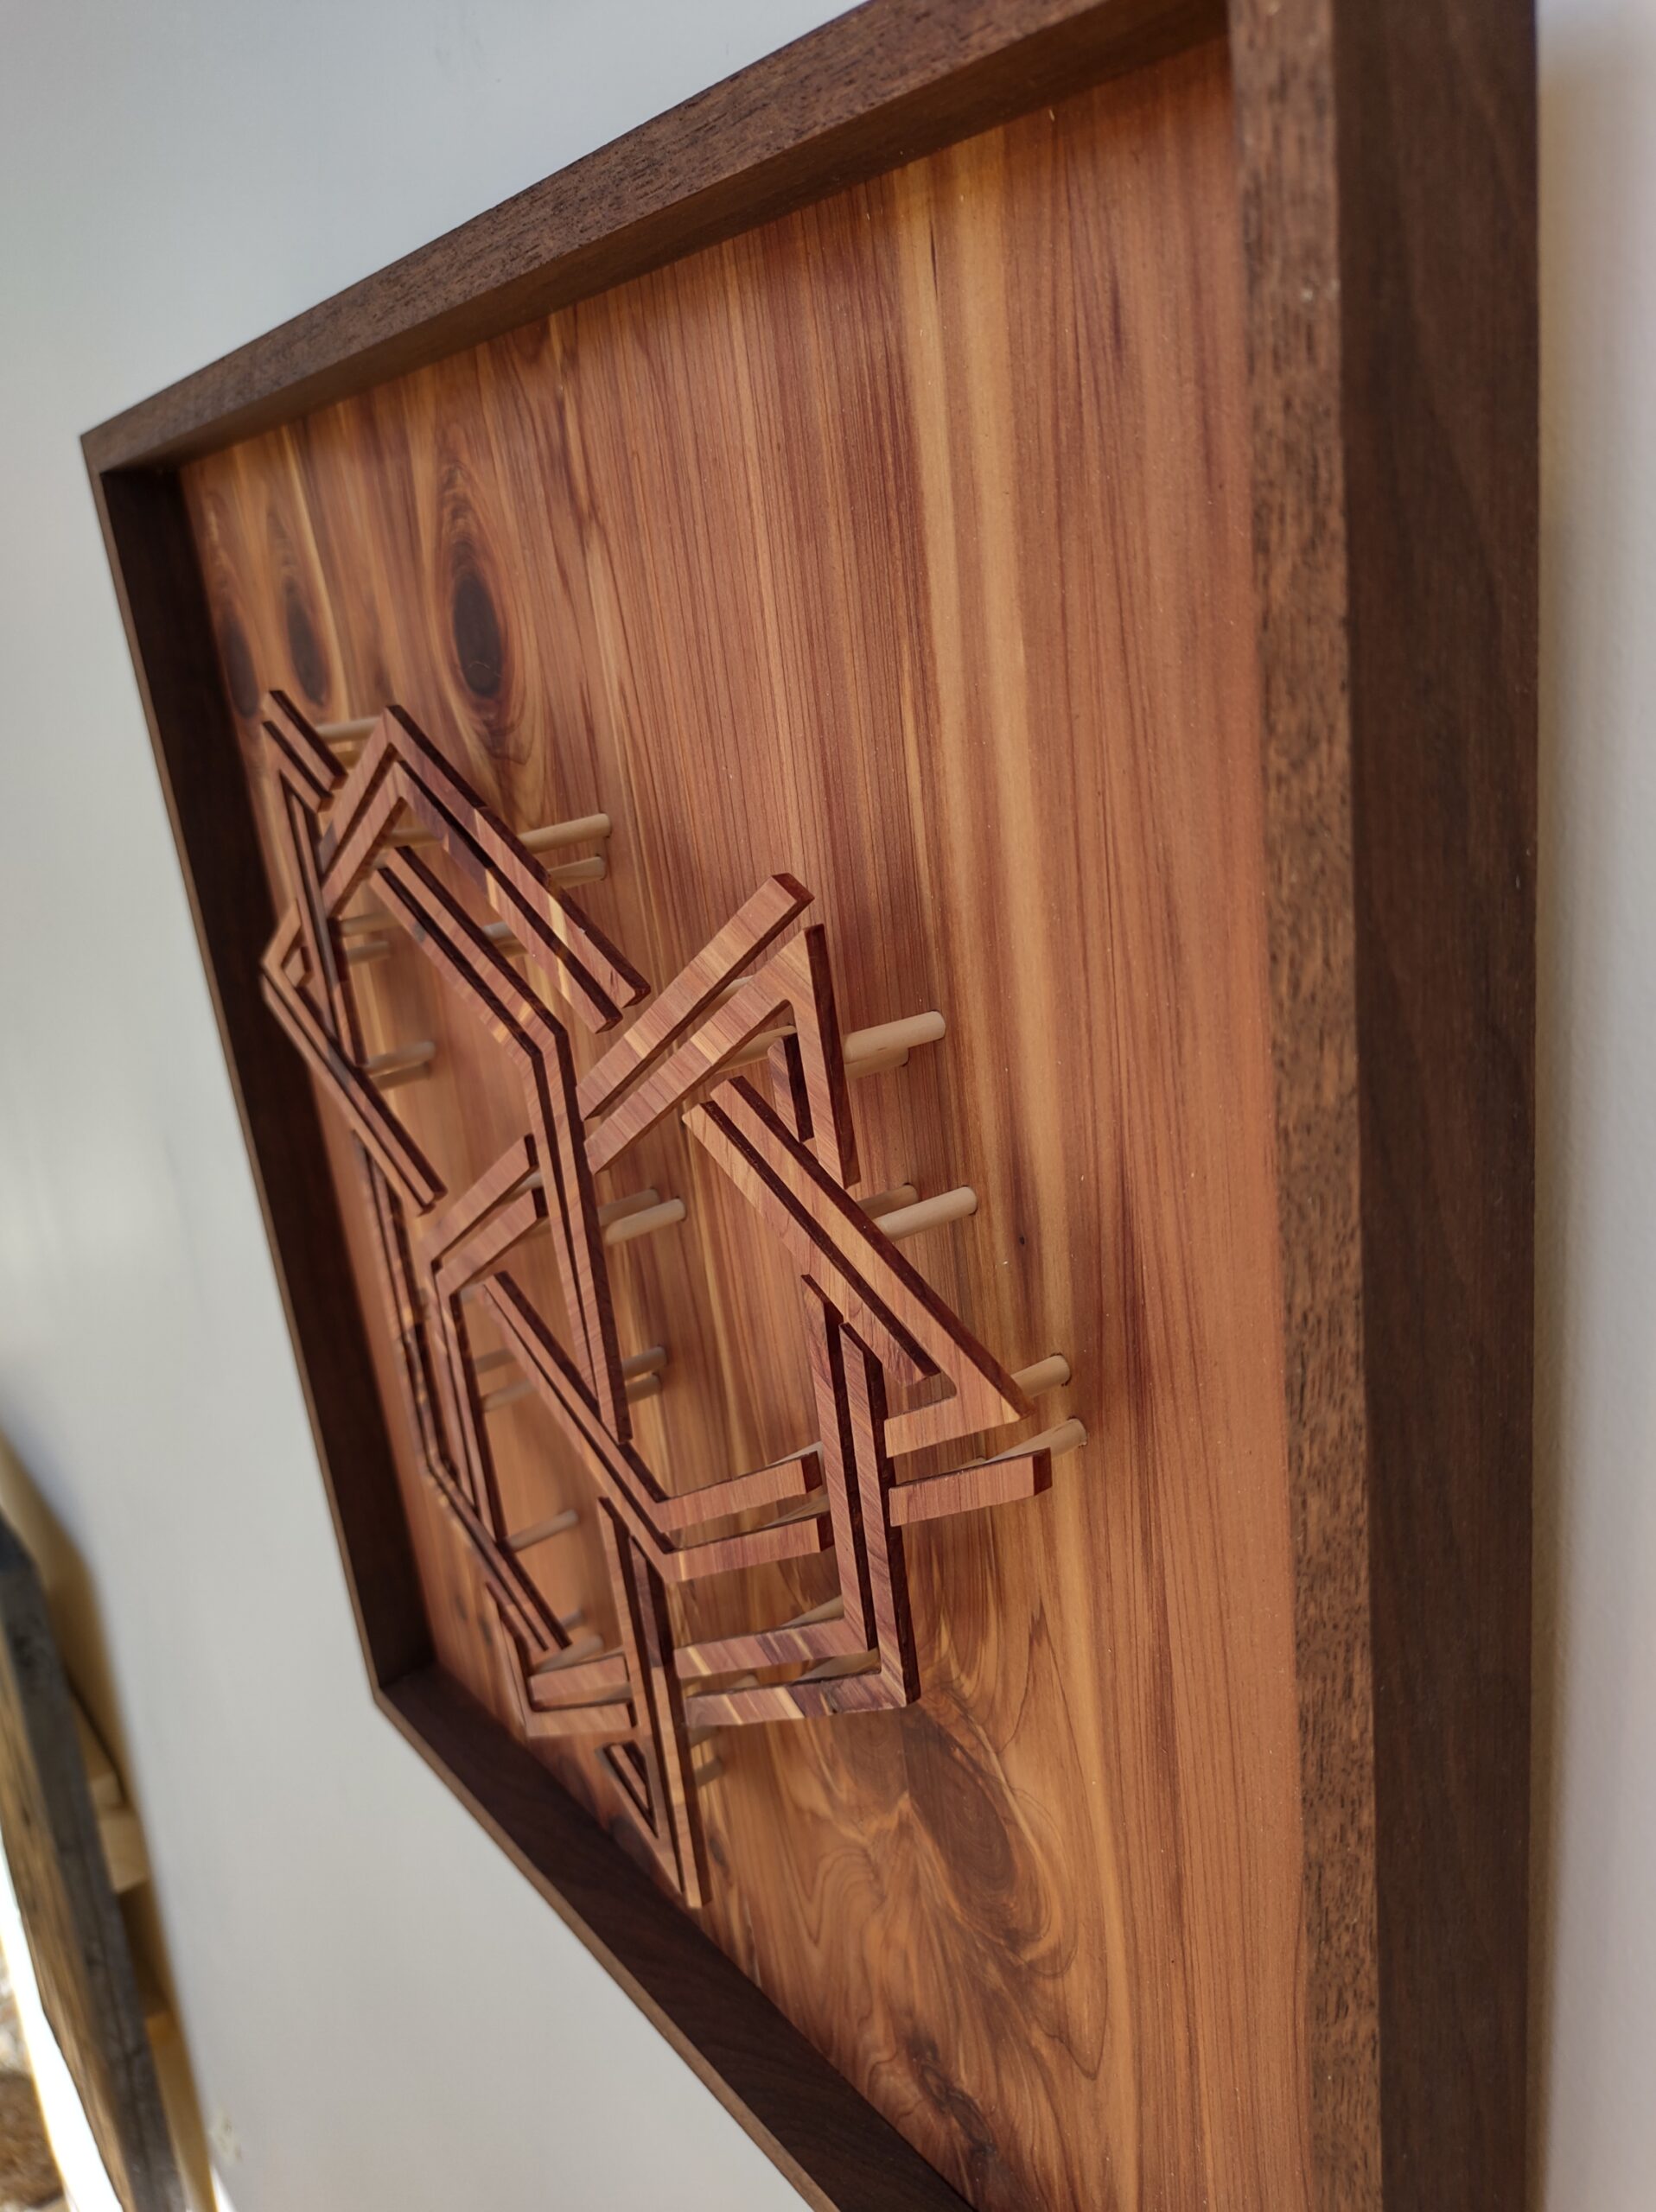
    Upon closer inspection, you can see that there are nine pieces that make up the two rings. The four supports are placed in a way that supports all the pieces and maintains consistent gaps between them.

    maquette which was swiftly destroyed by a stiff breeze
    CNC machining making a grande mess of things
    Ideal viewing conditions for this piece: strong sunlight with a nearby shadow to reflect in.
  • projected isometric tercet knot

    projected isometric tercet knot

    This is a double-lined, triple-component knot based on an isometric grid. The rules of knot making are slightly bent with the double line, but half the fun of making your own system is breaking its rules.

    one of the 3 components is highlighted here. the implied shape in orange follows the rules, but the red is just along for the ride.

    It is “projected” is because its construction uses small wooden dowels to lift the individual pieces above the surface. This lets the viewer see the knot at different angles beyond the surface plane just by moving around. Also, the complexity of the pieces is emphasized by the projected shadows.

    The first iteration of this design (below) was purchased after being shown by The Arts & Cultural Alliance.

    The final piece was constructed from aromatic cedar framed in walnut.

    here are the holes before assembly. this is why I needed a color-coded guide.

    Added bonus: to keep everything organized during assembly, I color-coded an illustration of the piece. The colors were all over the place for easy identification, but they looked so cool, I put them on a shirt.

    notes on this project from my sketchbook

    The finished piece teeters on the edge of simplicity and complexity. I like letting the natural patterns of wood do the work for surface treatments.

  • unicursal pentad knot

    unicursal pentad knot

    Follow the (implied) line with your eye. The line is unicursal, meaning there’s only one line. At first you might be tempted to assume there are five sections, and of course there are, but the radial symmetry is just a property of this particular line.

    These are probably the most difficult knots to design because you have to imagine the same numbers of aligning starting and stopping points as you have divisions of a circle. In other words, for a pentagonal rotation like this one, you have to imagine a line which will connect with itself every time you rotate it 72 degrees.

    The materials I chose for this are a combination of very fancy and exotic and down-to-earth. My uncle probably had no idea I was going to end up making this when he tore down his old barn. (Thanks for the materials!) The knot itself is padauk, which is so nice I almost hate to use for anything but marimba keys….

    This piece was recently on display at RED Gallery as part of an A1 Lab Arts group show.

    sketchbook notes and sketches
    the finished piece, the moment everything was put together
  • tercet knot progression with self-similar encompassment

    tercet knot progression with self-similar encompassment

    Self-similarity within structures is always fascinating to me. After creating a knot encompassed in an element of itself (above), I thought it would be nice to also show a progression from the simplest component to a much more complex version of itself which would in turn cycle back to the beginning.

    this illustrates the progression seen on the individual pieces

    Each of the final pieces changes slightly from the one before it to create the cycle.

    notes and to do list in sketchbook

    You may be wondering, where did that nice oxidization come from? In my studio, I have a clearly labeled bottle of RUST JUICE for just such an occasion. On properly pickled metal, you can actually see the rust form within seconds.

    my metal prep schedule and checklist. mostly because I quickly forget how many times I’ve sprayed something.
    the first version was done on galvanized steel, which oxidizes in a different way
  • axonometric scale listing band

    axonometric scale listing band

    the question

    Is there a shape, which when repeated, can create a Mobius strip?

    Yep, there is. Really all you have to do is chop up a strip into squares, however many pieces you want and there you go, done.

    That was easy. Maybe I’m not asking the right question.

    the better question

    Is there an asymmetrical shape which interlocks with itself to create a continuous band on a non-orientable surface?

    That one is a lot better, but it seems a little unrealistic that I would have started out wondering that instead of the first question.

    an answer

    To create a simple shape that tiles rectilinearly, you can start with a square, and any change you make to one side, you make the opposite change to the other side. So, if you squish in from the right, you squish out from the left. Continue until you have something interesting.

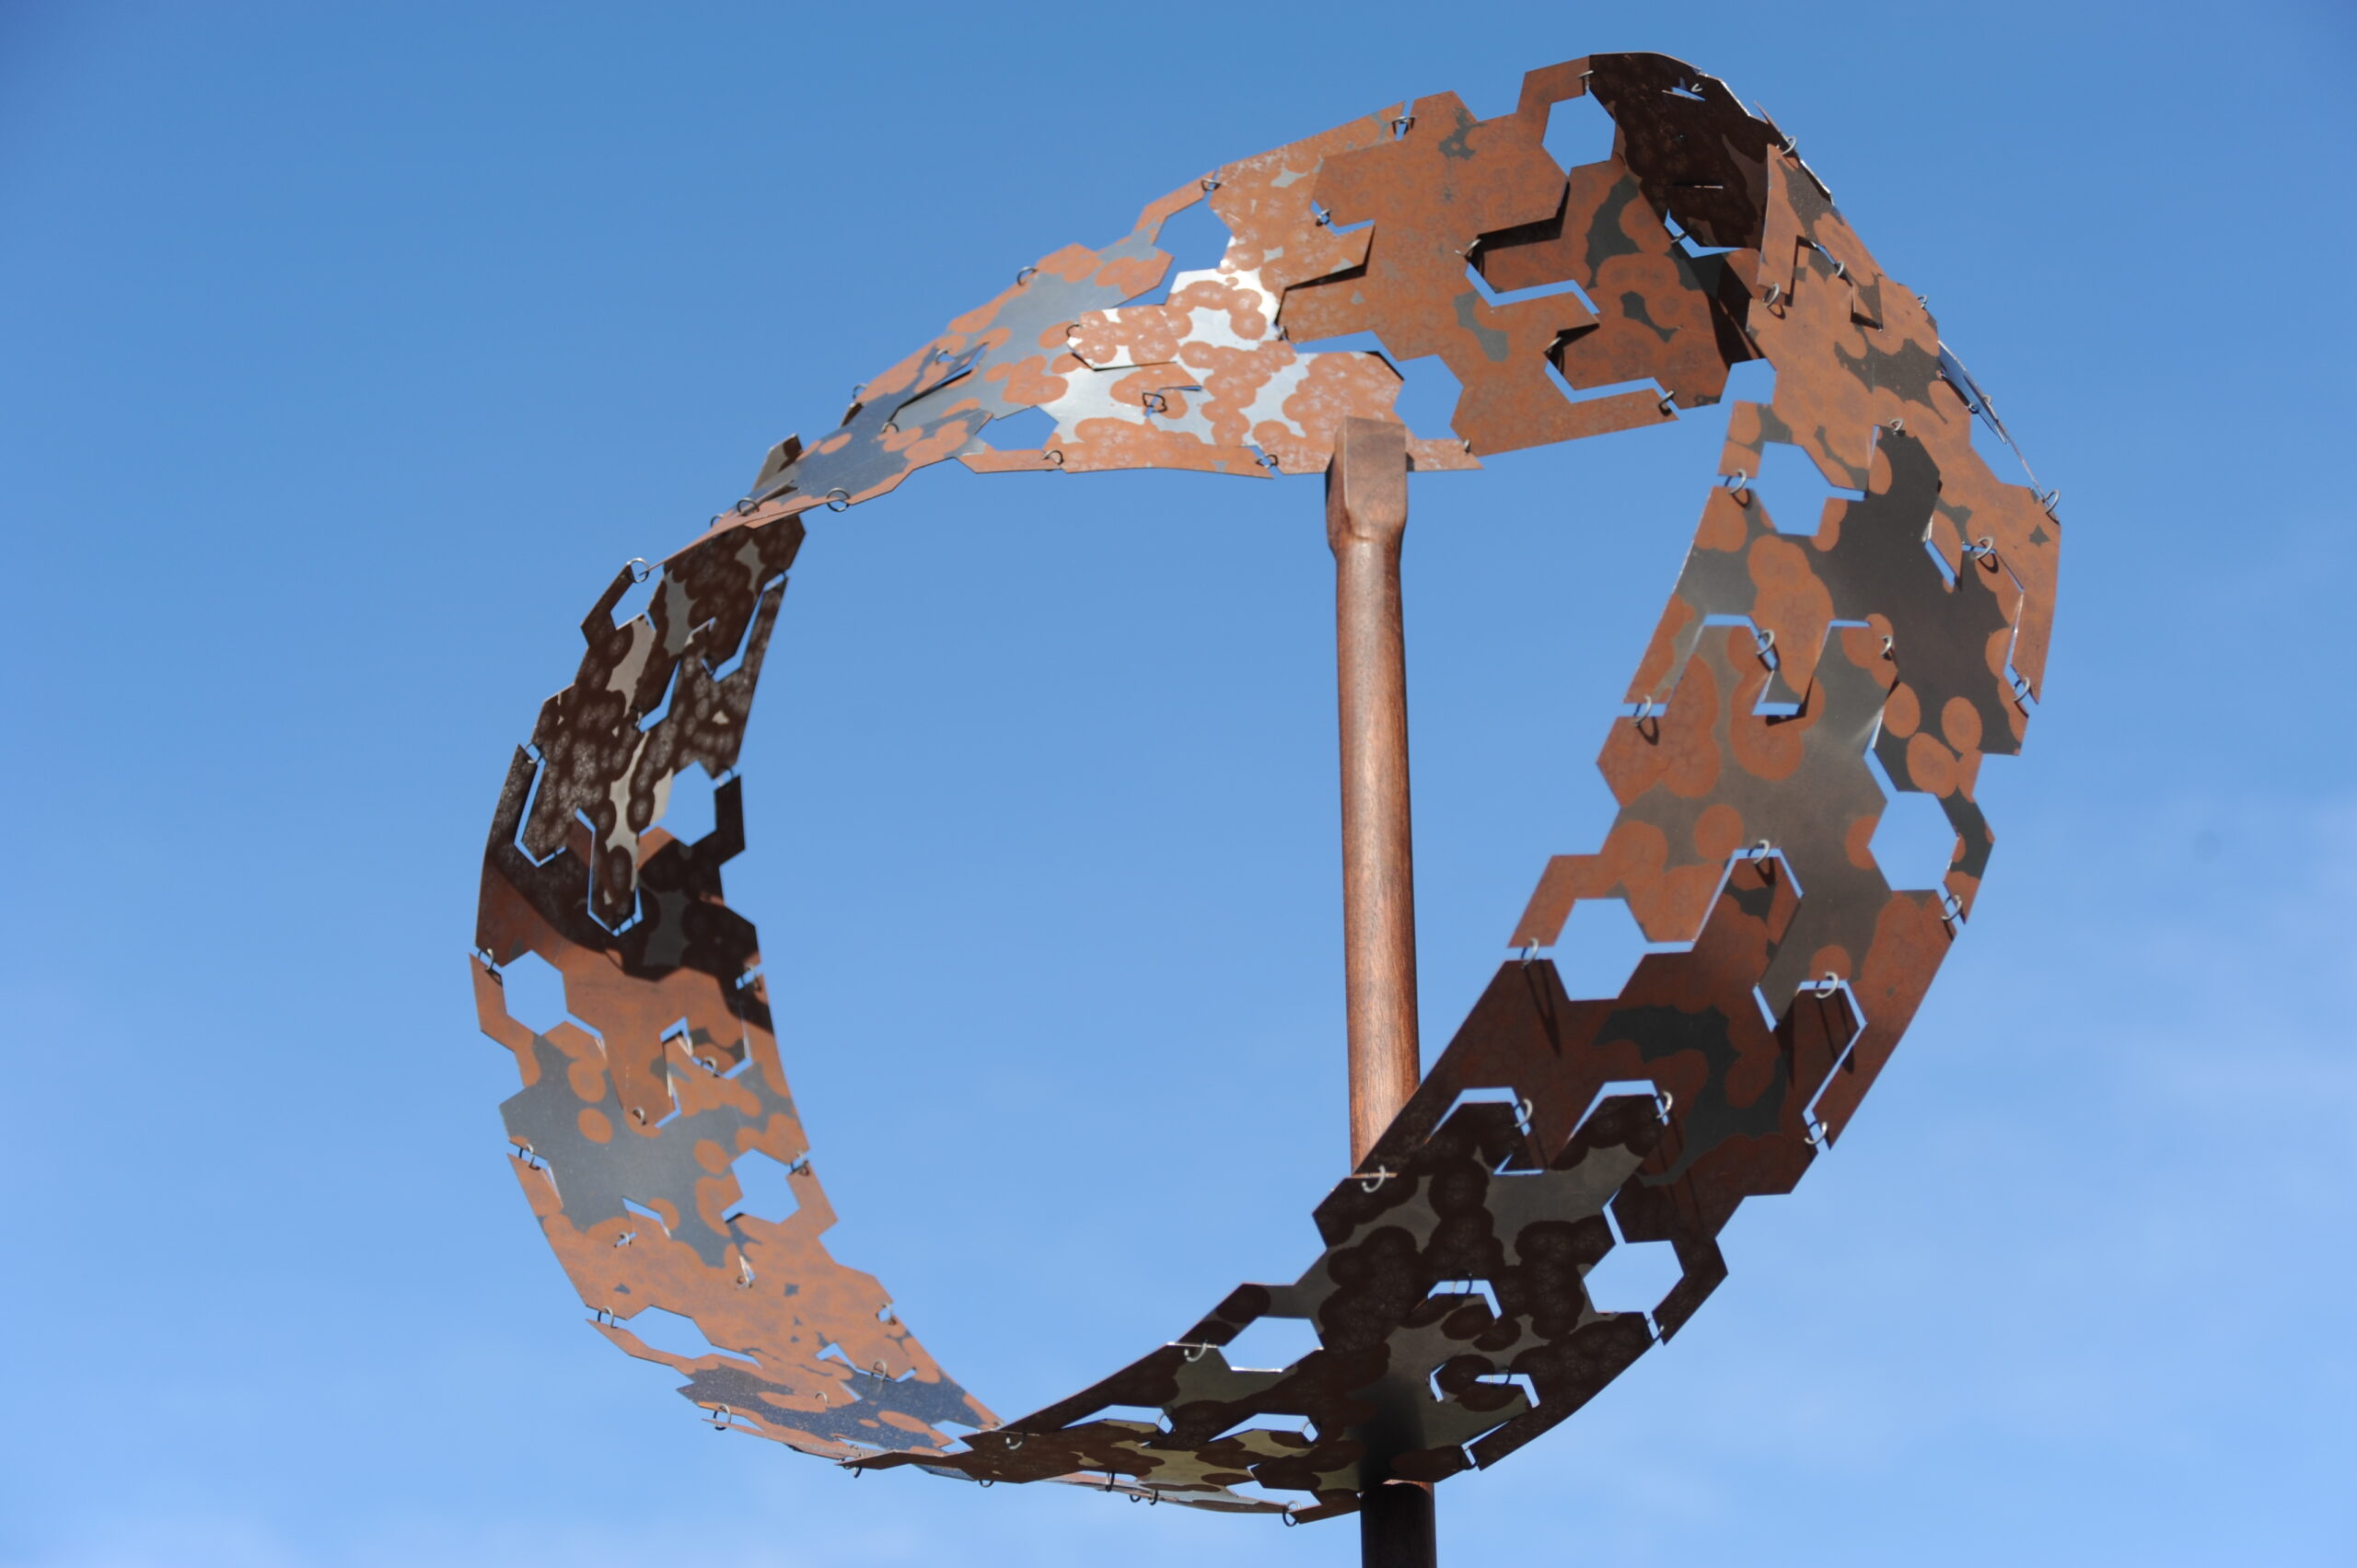
    Listing bands have the additional twist (pun intended) that at some point, the top of one tile (or “scale” which is what I’m calling the individual components) is eventually going to have to fit in with the reverse of the bottom of another. Only bands made up of odd numbers of scales will work. This is probably easiest to understand if you consider that just one scale, twisted into a band would have to fit into itself this way, and one is an odd number. Even numbers simply twist too many times for an asymmetrical scale.

    This particular band is made up of nineteen individual scales. They were fabricated from .03″ mild steel and allowed to rust naturally. The scales were designed so that just the right amount of twist and bend could happen with this size and material.

    one finished scale and its idealized shape
    notes and sketches
    wire used to links scales together

    The base was constructed from fir and walnut. Displaying a band this large was a challenge, since it sort of collapses if it’s set on the floor. The base allows easy viewing from multiple angles, which is really necessary to get an idea of how complex the shape is. Fortunately there’s a sweet spot that allows just the right distribution of weight so that it’s balanced and sturdy on the base.

    In lieu of a maquette, I did a bunch of calculations, which is usually a recipe for disappointment. Luck was on my side this time.